 This article may contain quest spoiling information!
Mission 1 - Gaining Access
- He'll tell you to explore the hellgate discovered deep in the dwarven mine here
 : :
- Step near the hellgate and a message will appear on your screen from Rashed summoning you to him before attempting to enter.
Magical Objects/Portals
- Go to Pharaoh Anhamtap in Yehsha and ask him to take you to 'Eashal'. Now speak to Rashed and ask him about a 'mission'.
- He will send you to find 3 magical objects and touch them to strengthen your soul for the journey ahead.
- You can do this part of the mission in any order.
Sunken City Portal
- Travel to Abukir and make your way past the Key 7000 door, then follow the path as shown:
- You'll find yourself on a floor with some stairs down and a passage north blocked by magic walls on both sides.
- Go down the stairs and north, you'll find a puzzle there which you will need to solve.
- You can move around each piece of the puzzle by right-clicking the section and it will move to the empty slot if there is one next to it. Solve the puzzle by forming the shape of a watcher as shown below to drop the magic walls above.
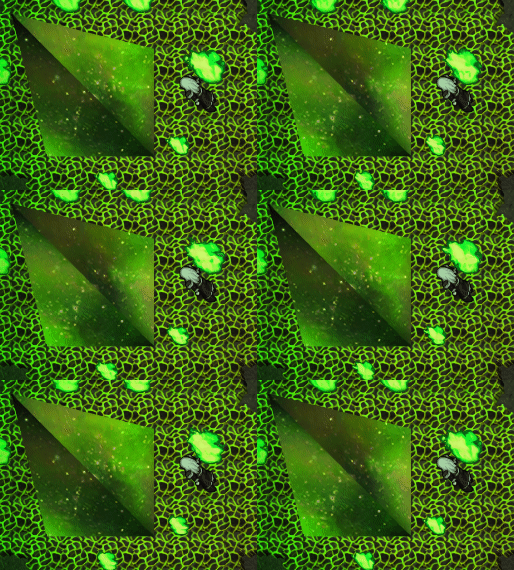
- Now go north and into the portal, you'll find yourself in another dimension filled with green fire and mushrooms.
- Simply follow the path as shown below to find your goal, then right-click it to receive its power.
Mittenhoff Mountain portal
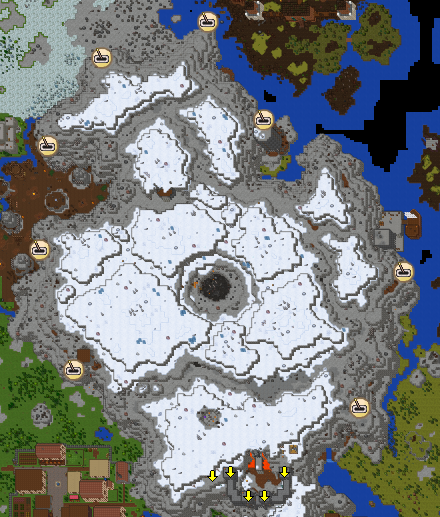
- Go up the stairs at the end of the path and you'll find a room with 8 levers. Certain levers need to be pulled to the right for the stairs down to appear. The combination is different after every server save and you can find it out by checking the levers in the 8 locations shown on the map below which correspond to the 8 in this puzzle.
- Go down the stairs and follow the hall north and enter the portal. You'll find yourself in another dimension filled with purple flames and tentacles, follow the path to reach your next goal and right-click it to receive its power.
Mylvalone Portal
- Travel to Mylvalone, if you're doing this faction you can travel there with Leshilai by saying 'passage':
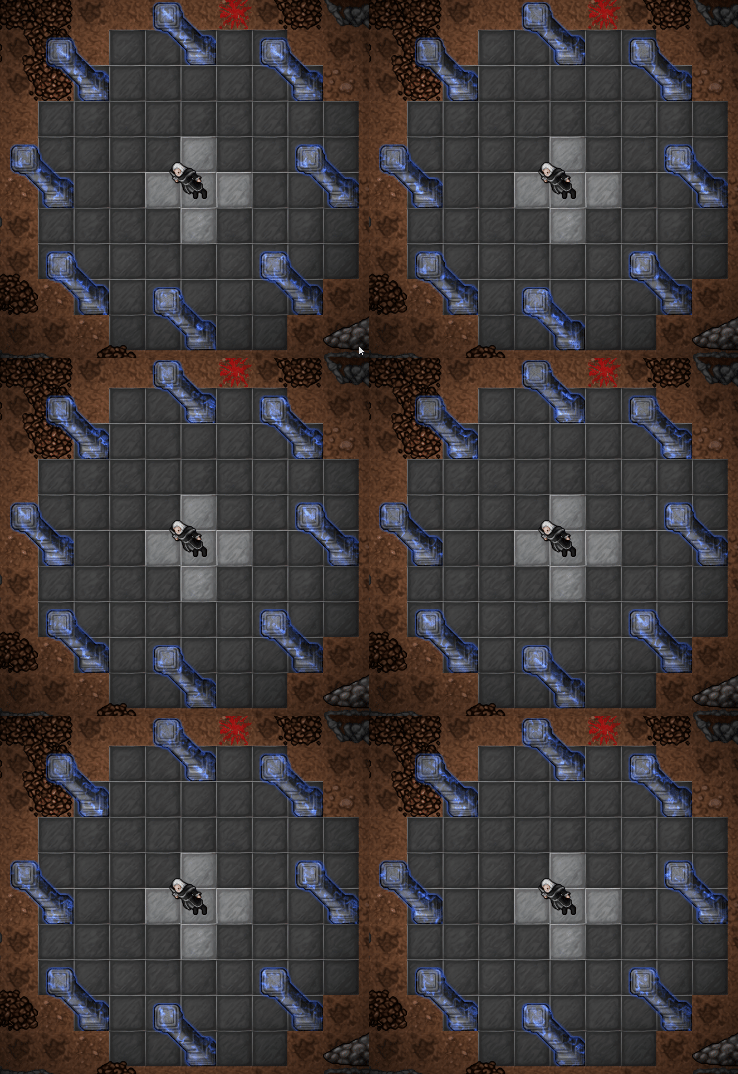
- Once you're on the floor with the magic walls, go to the south part with the pillars. In order to remove the magic walls, you'll need to right-click the 8 pillars in the correct order. Right-click the pillars and they will briefly flash in the order in which you need to press them. Do so and after 60 seconds the magic walls will dissipate.
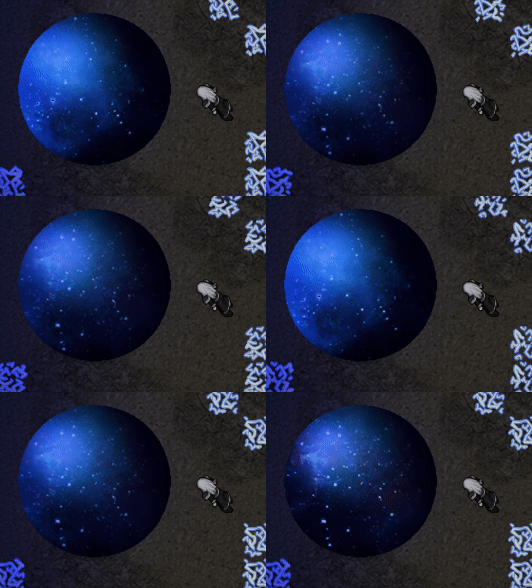
- Continue north and enter the portal at the end. You'll find yourself in another dimension filled with water and electricity, follow the path to reach your next goal and right-click it to receive its power.
Learning Soul Shield
- Now return to Rashed once again and tell him about the 'mission'. He will send you to find a red mage, a demonologist.
- Speak to Glechoma in Garrogat and ask him about a 'mission'.
- Glechoma will tell you to find him in the forgotten library in the Desert Dungeon Cave under the Nahari desert south of Eschen.
- He is located in a hidden room in the library in the desert dungeon cave here
 . You will need Key 4009 to open the door to the library. The hidden room entrance can be opened by placing the 5 different Books of Secrets on the stone pedestals inside the library. . You will need Key 4009 to open the door to the library. The hidden room entrance can be opened by placing the 5 different Books of Secrets on the stone pedestals inside the library.
- Once opened it stays open until the next server save and the books are not consumed, so not every player has to collect the books.
Hellgate Guardians
- Once you're done with Glechoma, you will need to defeat the guardians of the 5 lesser hellgates.
- You can do these bosses in any order. Only 10 people can access each of the hellgates at 1 time. A team of 6+ is recommended. You can repeat the bosses, but you cannot enter first if you've done it before, only after someone who hasnt done it has entered.
- The lowest recommended level for the blockers would be around 300, but 350 would be better. Equipment with elemental resistance is recommended (especially fire for the Belrekath and Qyreva seals). Two healers, or at least 1, would benefit the party greatly.
- One of the 5 bosses you need to have defeated for this mission is Thor'garak, but this is done through the Grim Faction so you don't need to do that again here.
Velranos - Lucindel Orcs Hellgate
- Travel to the orc encampment west of Lucindel here
 , follow the path down to the hellgate. , follow the path down to the hellgate.
- In this seal you'll face a lot of Demorcs and Demorc Brutes. Just go slowly but be prepared to face 3-4 at a time.
- Go into the tower, you'll need to go to the top of both of the towers and pull the 2 levers there.
- You'll be facing several Demorcs and Brutes on each floor up so shooters should take care.
- Once you pull both levers, go downstairs to the bottom floor of the tower, once again you'll face some Demorcs and Brutes, but also a Demorc Warchief in the portal room who is quite a bit stronger.
- You can enter the boss room by right-clicking the black poison snake statue.
- You'll face the Typhon boss Velranos here, he does a lot of poison damage so Amulet of the Elements and any other elemental damage reduction options are a good call. Knights should do their best to avoid the wave and face the boss away from the shooters. Just shoot the boss down as quickly as possible using SDs.
Zarguth - Desert Dungeon Hellgate
- Travel to the Desert Dungeon in the Nahari desert south of Eschen here
 , follow the path down to the hellgate. , follow the path down to the hellgate.
- You'll face Ashlords and Hellions in this seal, go slowly but be prepared to face as many as 6-7 hellions or 3 ashlords, or a few of both at the same time.
- You will need to right-click all 7 bone pillars around the seal, each time you right-click a bone pillar it will spawn between 0-3 ashlords and 0-3~ hellions so take care when clicking them.
- Once you've clicked all 7 pillars, the entrance to the tower in the middle of the seal will open and you'll have access to the boss portal.
- The boss you'll face inside is Zarguth, the Incidamus boss. This one isnt particularly strong so just keep it away from the shooters and shoot it down with SDs.
Qyreva - Corrupted Island Hellgate
- Travel to the ruined village on the Corrupted Island near Abukir here
 , follow the path down to the hellgate, you'll need Key 7003 if the door on the Corrupted Island isn't unlocked. , follow the path down to the hellgate, you'll need Key 7003 if the door on the Corrupted Island isn't unlocked.
- You need to throw fire fields on top of the 4 button tiles in the corners of the last room in the double demon spawn as shown below in order to open the hole at the north of the room. You can use a Fire Field Rune or use the fire elemental the demon summons to cast them under you onto the tiles.
 - You'll face Hellfires and Cerberuses in this seal, go slowly but be prepared to face as many as 2-3 hellfires and a cerberus at once. The blockers should make sure to keep the cerberuses facing away from the shooters, mages may want to consider using Magic Shield even though they will lose mana from the on fire debuff. Everyone should use the Amulet of the Elements and get as much fire resistance as they can for this one.
- You will need to have 3 players step on button tiles in the castle for a fire wall to drop so you can pull a lever behind it that opens the path to the boss.
- 2 buttons are on top of the towers in the north-east and north-west parts of the castle and 1 is downstairs. There are hellfires in the towers and the downstairs area has a cerberus and several hellfires so take care!
- Once all buttons have been stepped on at the same time, the fire wall on +2 will drop, take care as it will release 2 cerberuses. Kill them and pull the lever behind the throne in the room behind the fire wall.
- Now go back down the stairs to the gate, enter the left side of the walls and go downstairs to make your way to the boss portal.
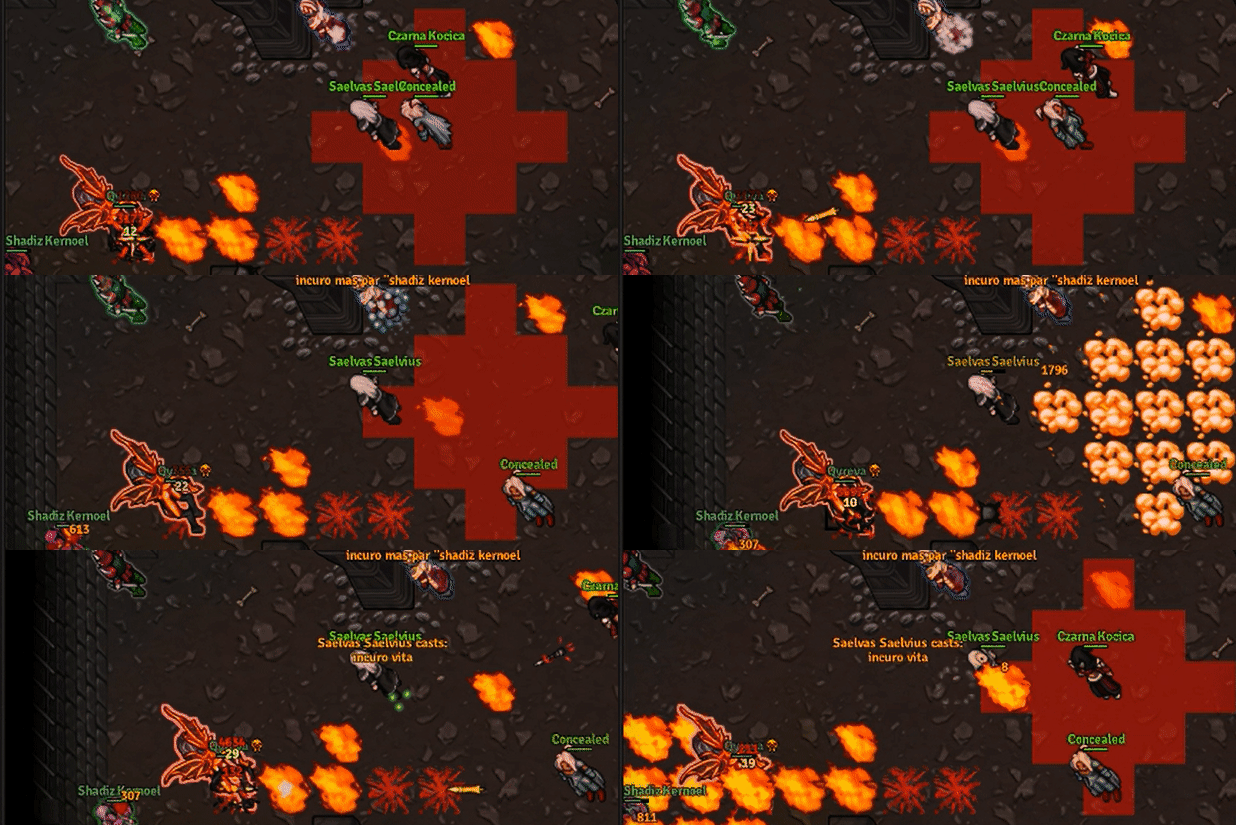
- The boss you'll face inside is Qyreva, the Succubus boss. This one is one of the more dangerous ones. The boss keeps a distance, the main blocker should stand at the left or right side of the arena to keep the boss facing AWAY from the shooters. Shooters should be very attentive and make sure to avoid the announced fire bomb attack the boss uses. A large diamond shaped area of tiles will glow red about 2 seconds before the attack is executed as a warning, the attack deals 1200-2000+ fire damage even using the AmuletoE.
Belrekath - Pits of Inferno Hellgate
- Travel to the Pits of Inferno dragon lord spawn in the desolated lands north-east of Arak here
 , follow the path down to the hellgate. , follow the path down to the hellgate.
- You'll face Succubuses and Hellfires in this seal, go slowly but be prepared to face as many as 3-4 hellfires and a succubus together.
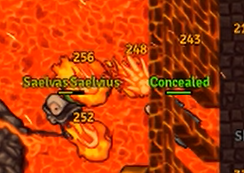
- Knights should take care to face the succubuses away from the shooters, and the shooters should be very attentive and avoid the announced fire bomb attack, same as with Qyreva in her seal (as shown in the gif below). Mages should use Magic Shield for this one. Amulet of the Elements and fire resistance is recommended for everyone in this seal.
- You will need go to the hill in the east part of the seal and pull the lever there to open a hidden hole.
- Once you've pulled the lever, go back the same way to find the hole, you'll face more hellfires and succubuses inside, follow the one-way path to find your way to the portal.
- The boss you'll face inside is Belrekath, the Flamebringer boss. This one is a bit more tricky and complex, and the boss has some special abilities.
The boss fight has 2 stages, the first stage takes place on a lower floor, and once the boss gets down to below 50% health it's teleported and the floor turns to lava. Mages should take care at this point and take off their Energy Ring and walk slowly over the lava as it does 200-300 damage per step.
The second stage can be reached by going over to the left side of the room and levitating up to the left, and then going up some stairs.
- A special ability he has is summoning Hellfires, but this is announced and can be prevented by quickly stepping on the skull pattern that appears on the floor near the boss.
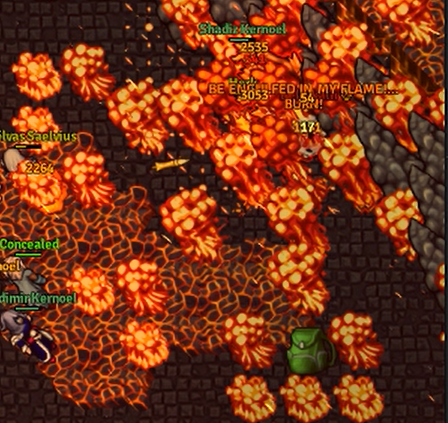
- Belrekath sometimes casts an announced Ultimate Explosion type spell which can deal as much as 2000-3000 fire damage. He will yell 'BE ENGULFED IN MY FLAME!...' and 4 seconds later he will cast the spell, it cannot be avoided in melee range.
- Once you've defeated all the hellgate guardians, you can access Sheol through the main hellgate in the dwarf generals area of the Mittenhoff mines.
Mission 2 - Blood Witch Task
- Travel east into the city of Zarrith.
- The watcher guards at the gates will stop you and ask your identity, say you are 'human'.
- You will be allowed to the city and directed to Arbiter Kerrin.
- Kerrin will welcome you to the watcher war effort and task you with slaying 900 Blood Witches.
- The reward for completing this task is 2,000,000 Experience.
Mission 3 - Freeing Molgorth
- Information incomplete:
- You'll need to speak to Molgorth in the citadel? and then to Arbiter Kerrin.
- Now go to the library? and click the egg? and you'll see a cinematic.
- Return to Kerrin again and he'll tell you to gather 8 Violet Magic Orbs to free Molgorth.
Mission 4 - Ashlord Task
Mission 5 - Magic Stones
- Information incomplete:
- You have to fight your way to reach 4 magic stones?
Mission 6 - Blasphemer Task
- Information incomplete:
- You will need to slay 800 Blasphemers.
- The reward for completing this task is 2,280,000 Experience.
Mission 7 - The Tower
Mission 8 - Incidamus and Venerator Souls
- You will need to slay 500 Incidamus and 500 Venerators and collect their souls using a Souldrainer.
Mission 9 - Corruptor Crystal
- Information incomplete:
- You'll need to travel deep underground in Sheol, right-click 2 gravestones. Each gravestone will summon a boss, they are Ozgalluch and Tagthoder.
- Now travel further and find the shining large black crystal, the one on the mission needs to right click it.
- Fog will appear making the area into an arena and a battle will begin which includes waves spawning every 1-2 minutes? There are about 7-8? waves and each consist of 3 creatures spawning. Each of the 3 creatures can be either a Corruptor, Ashlord or Incidamus.
- Once you clear all the waves the fog will disappear and the mission is complete.
Mission 10 - Demorc Task
- Information incomplete:
- You will need to slay 700 Demorcs.
- The reward for completing this task is 1,120,000 Experience.
Mission 11 - Convince Demorc Brute?
Mission 12 - Demorc Warchief Task
- Information incomplete:
- You will need to slay 700 Demorc Warchiefs.
- The reward for completing this task is 2,950,000 Experience.
Mission 13 - Kill Blacksmith?
Mission 14 - Cerberus Task
- Information incomplete:
- You will need to slay 1000 Cerberuses and collect 100 Cerberus Heads for this mission.
- The reward for completing this task is 3,650,000 Experience.
Mission 15 - Flamebringer Task
- Information incomplete:
- You will need to slay 400 Flamebringers and collect 4 Blazing Cores for this mission.
- The reward for completing this task is 3,040,000 Experience.
Mission 16 - Typhon Task
- Information incomplete:
- You will need to slay 350 Typhons, collect 50 Typhon Ears and 20 Hellstone Ore for this mission.
- The reward for completing this task is 2,800,000 Experience.
Mission 17 - The Forge
- Information incomplete:
- Travel to the forge?, then to the demonic hand? and then to the forge in the past.
Mission 18 - Corruptor Task
- Information incomplete:
- You will need to slay 500 Corruptors.
- The reward for completing this task is 4,650,000 Experience and the Crimson Key to the Black Gate.
Mission 19 - Succubus Task
- Information incomplete:
- You will need to slay 400 Succubuses.
- The reward for completing this task is 1,960,000 Experience.
Mission 20 - Dreadlord Task
- Information incomplete:
- You will need to slay 150 Dreadlords.
- The reward for completing this task is ?.
Mission 21 - The 6 Seals
Mission 22 - Rashed and Baalerun
- You must defeat Rashed.
- After that you are teleported to a destroyed version of Eschen filled with Nightmares, Succubuses, Typhons, Venerators and Corruptors and travel through the city and out of it, then north along the coast towards the Black Castle where you will find a portal that takes you to the final fight with Rashed's true form as Baalerun.
- Once you defeat Baalerun you are awarded Baalerun's Core which Blacksmith Azzodon can craft into the Annihilator, Apocalypse, Doomcaller, Calamity or the Armageddon. You can also speak to Emperor Arsene about your 2nd promotion which provides regen boosts, death penalty reduction and a few other things.
- Congratulations, you've saved Medivia and gone a long way towards saving Sheol. Your soul is strengthened and you've achieved mastery in your vocation.
|


