 This article may contain quest spoiling information!
Mission 1
PS: If you are doing this quest as a team, then make sure all of the players have the item(s) required to complete the quest:
 Vial of Blood, Vial of Blood,  Vial of Slime. Vial of Slime.
- To start the quest you need to go to Thoris and ask Garrant for a mission (he is located in the Baron's Castle here
 ). ).
- After he's done talking he will tell you to seek out a guy name Forron (he is located here
 ). ).
- After you find Forron and talk to him, you will have to report back to Garrant, he will then ask you to explore the Ghostland.
Mission 2
- Head east from Thoris and explore Ghostland.
The way to Ghostland is in the picture shown below:
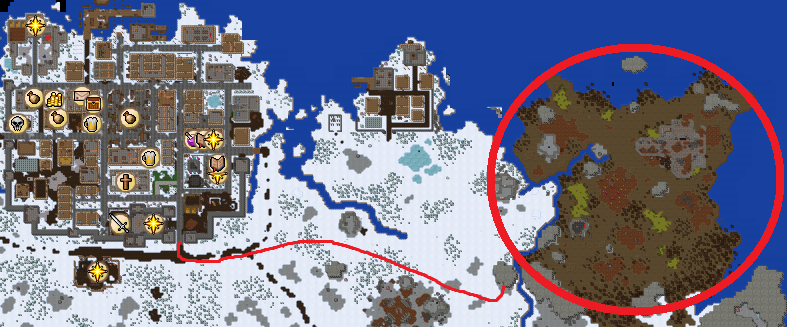
- You will now need to explore some underground cave in the Ghostland to trigger a scream, follow the path on the pictures below:
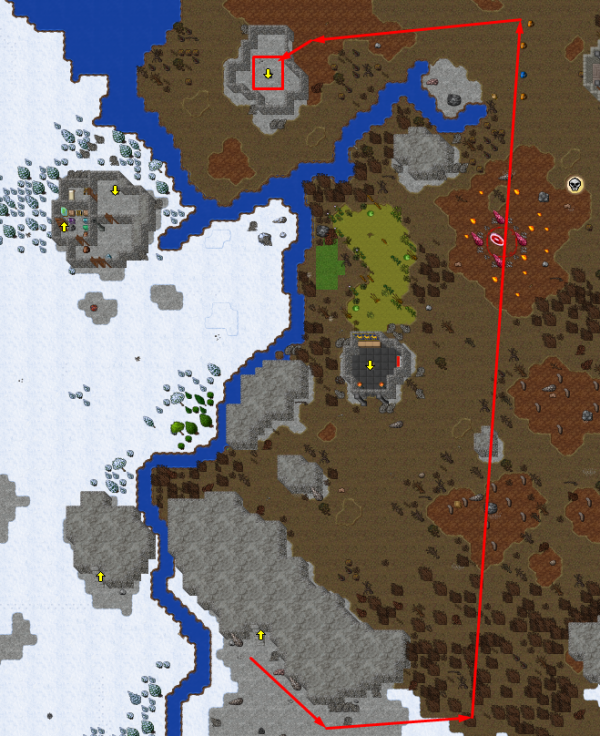
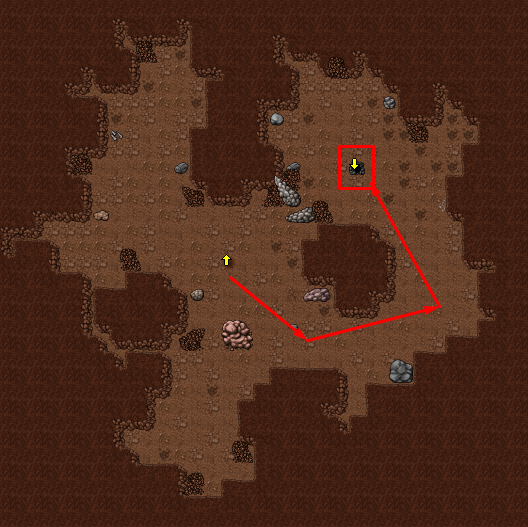
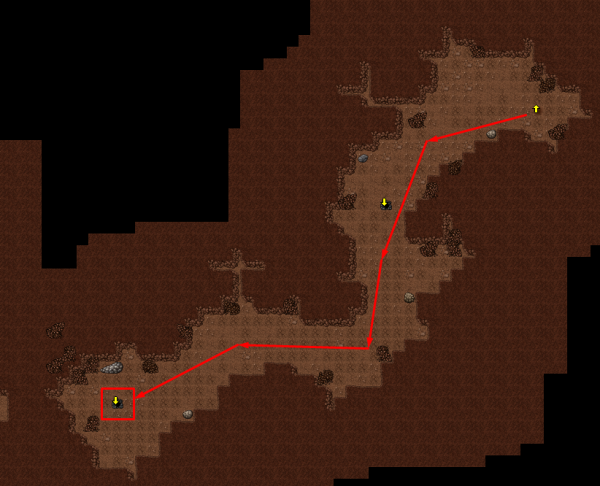
- BE CAREFUL here as you will meet a couple of Revenant on the way, and also some more as you go down on the picture shown below.
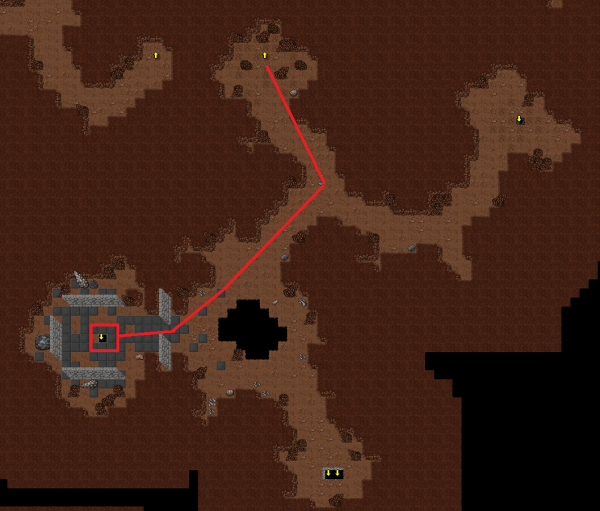
- The scream will be triggered somewhere around the square on the picture shown below, a system message will pop up on your screen saying: "The spectre screams something in unknown to you language, maybe the scribe in Thoris will know something about this."
- Somewhere around the way you should hear a ghost screaming "Mors valebit".
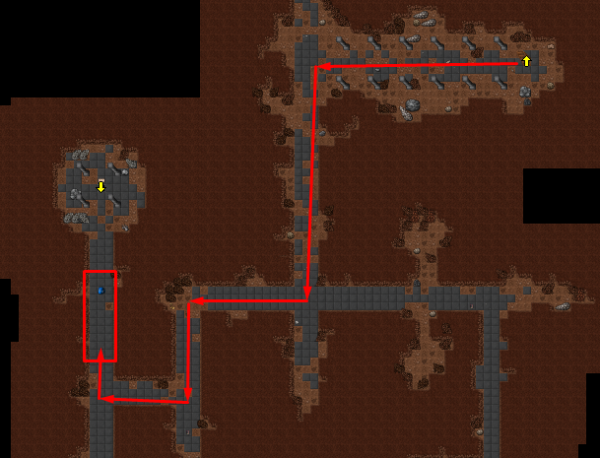
Mission 3
- Go back to Thoris and find the NPC Hosef say "hi" "mission" then followed by "Mors valebit". He is located on upper floor of Baron's Castle (here
 ) )
- Hosef will be appalled by what you tell him. Simply continue with mission 4 after Hosef is done raging.
- PS: If he doesn't respond to you try talking to NPC Garrant first.
Mission 4
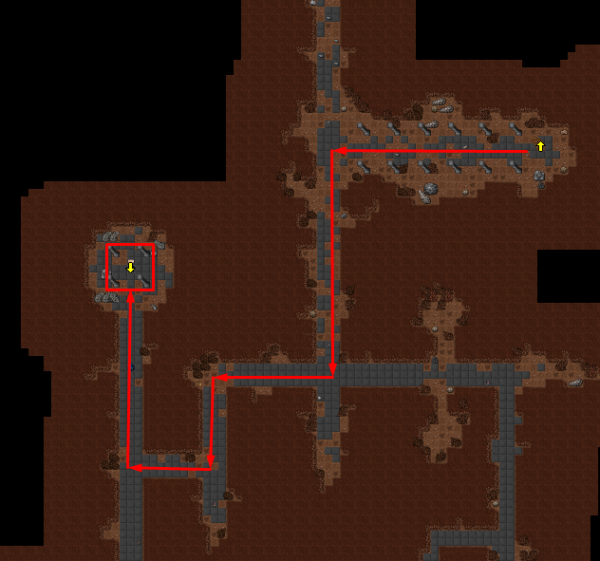
- Now you need to go back to the Ghostland again and enter the cave you just explored, till you reach this cave in the picture below, follow the lime-green lines on the path and pull all the three levers to remove the brick wall needed to proceed further on with the quest.
- PS: All levers should be pointing to the right if they are pulled.
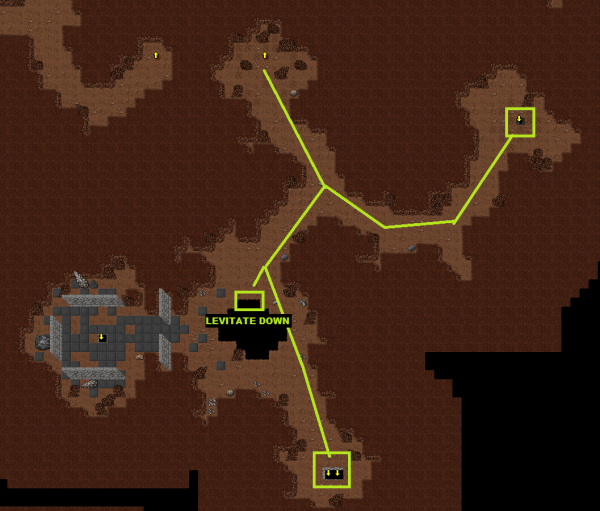
- After all 3 levers have been pulled, it's time to proceed further down the cave once again where you triggered the scream earlier.
- BE CAREFUL! You will face Banshee from here on out after going downstairs.
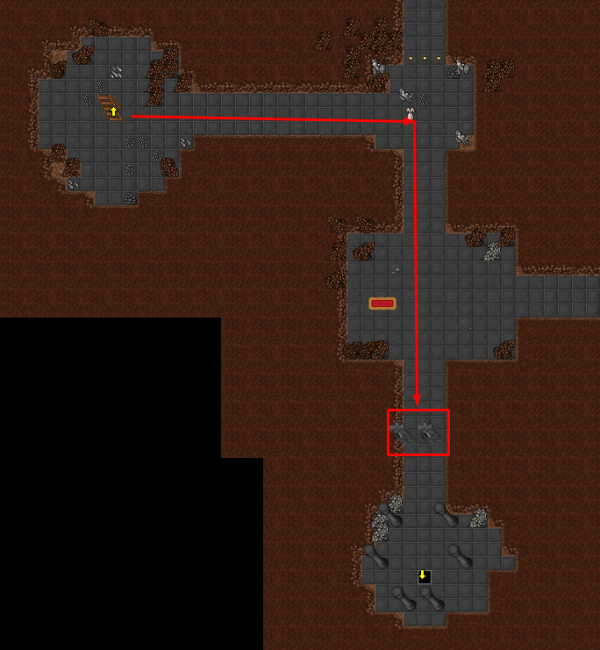
- When you reach the gate on the picture shown below marked by the square, you need to speak the words "MORS VALEBIT" for the walls to open so you can proceed further down, be careful of the banshee's you will face.
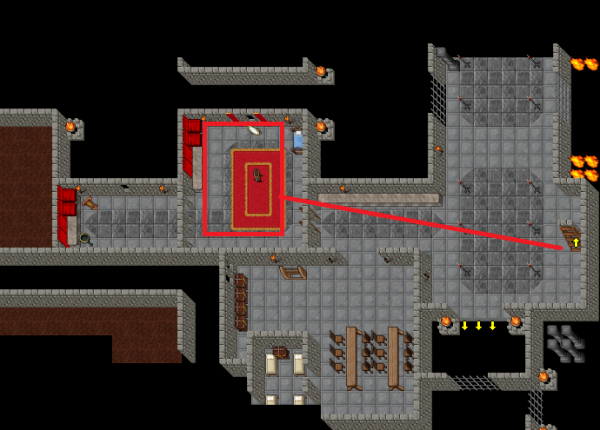
- You will find yourself now in an underground citadel. Speak to NPC Fasha(she is just west from the stairs). about "sadness" and "music". She is located around the red square marked in the picture below.
- After that, you will need to head downstairs and look for an NPC named Faya, follow the path in the picture below.
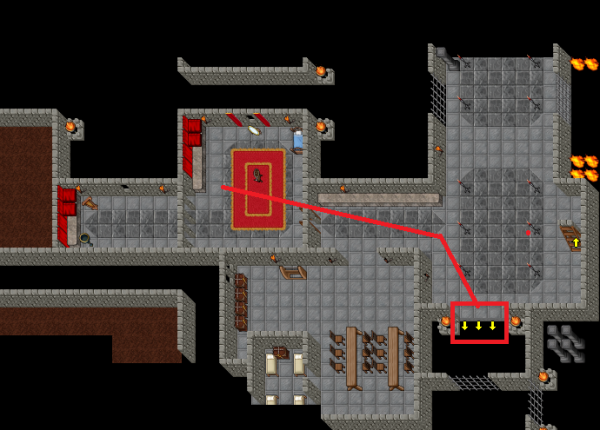
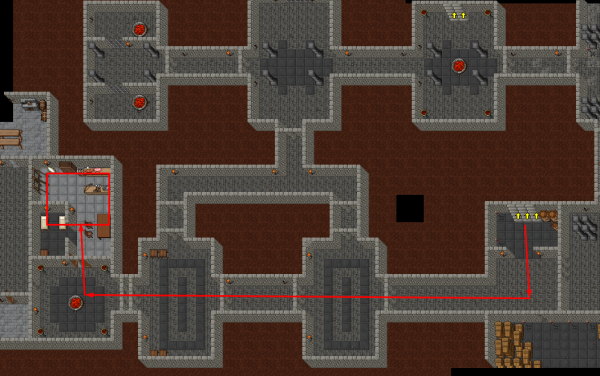
- Find her and mention "Fasha", when she is done talking, mention "music".
- After she is done talking return to the previous room where you talked to Fasha, but now we'll go past her and in a room to the west where the harp is located.
- You will now need to play the harp, BUT! - BE CAREFUL!!!! Using the harp will now teleport you to a new location with a lot of Banshee, and you will have to face at least 3 of them at once as soon as you're teleported.
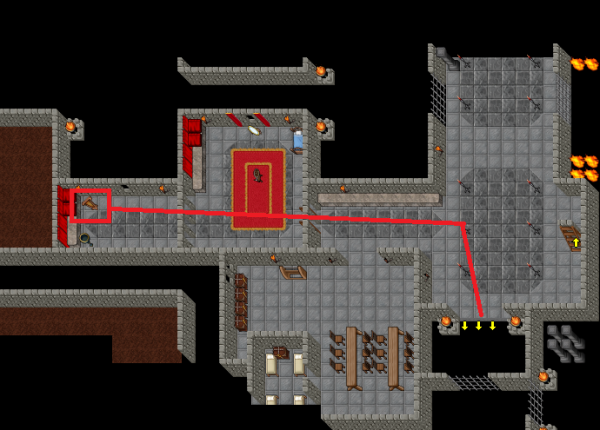
- After killing the monsters, you need to speak to NPC Fasha that is transformed to a whole different creature, who is now located just east of you in a similar looking room to where you previously were before being teleported.
- Ask her for a mission and she will tell you to find Book of Blood, after she's done talking.
*Make sure you wait for her to finish talking or you won't be able to retrieve the book.
Mission 5
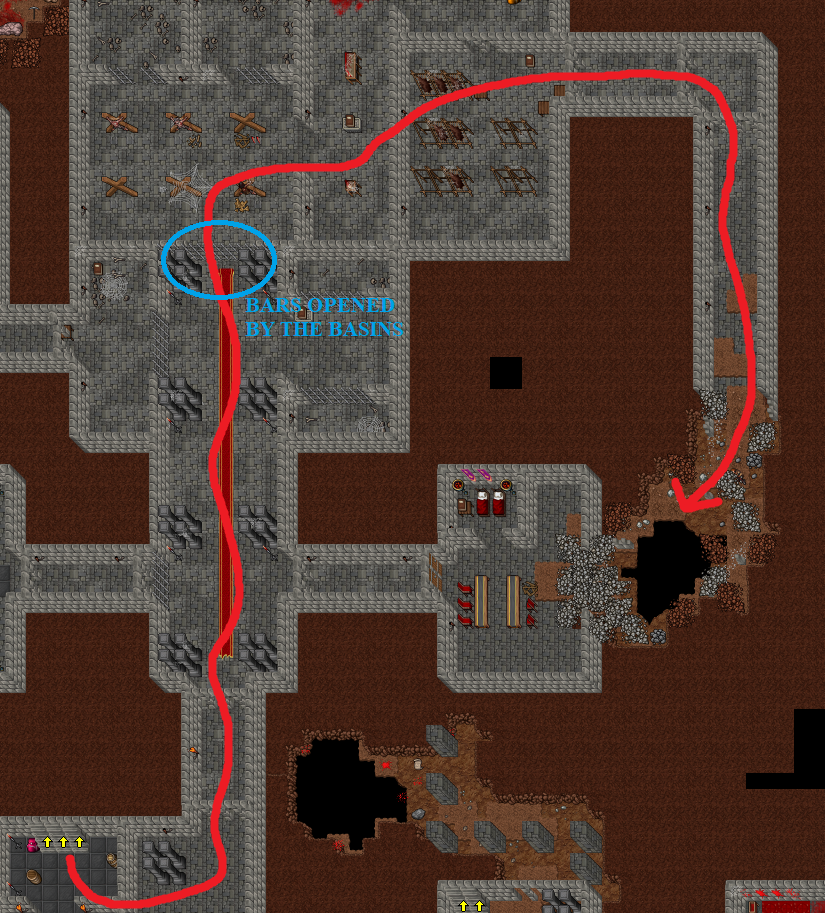
- Now you are to head north-west from NPC Fasha till you find yourself in a narrow passage blocked by bars. Follow the path on the picture below.
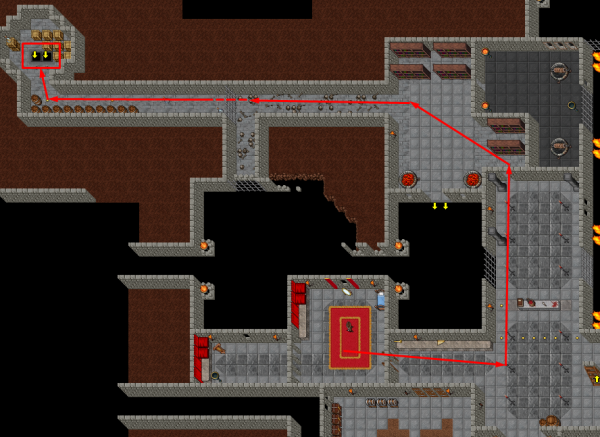
- You will find yourself a dead end in front of you by the bars that are keeping you in place, but you can pass through them as soon as you see some footprints of blood appear on the floor and passes the bars, just follow them.
- PS: Don't delay too long else you have to wait for them to reappear, the mechanic of this is random and is not static.
- When you pass the bars, you need to be CAREFUL! There is a Warlock waiting for you just downstairs, be careful as there are more Warlocks down here, the best way is to try to trap the first Warlock at the south-east corner as you go downstairs shown on the picture below.
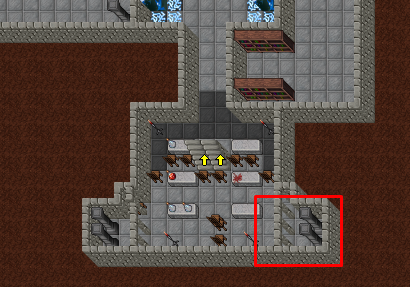
- After you've killed the first Warlock, you need to proceed further north in this room to retrieve the Book of Blood, you still have to fight more Warlock.
- Follow the path on the picture below, and use the book to retrieve it.
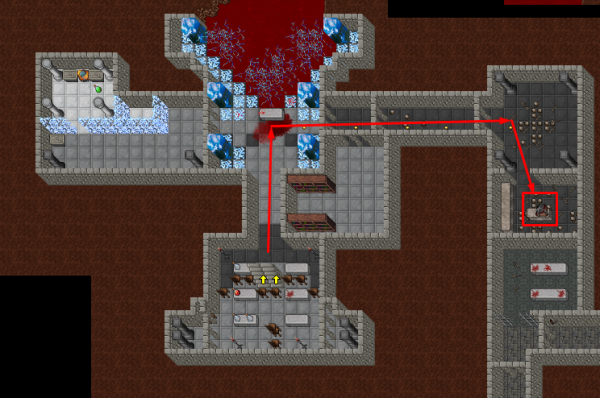
- Head back to NPC Fasha greet her with a "hi" followed by "Book of Blood"
Mission 6
- After you're done reporting back to Fasha, head back to the same room but instead of going to the right, you will head into a room to the left, where an NPC Eddie is located, speak to him.
-PS: The Warlocks might have spawned if you took too long, be careful.
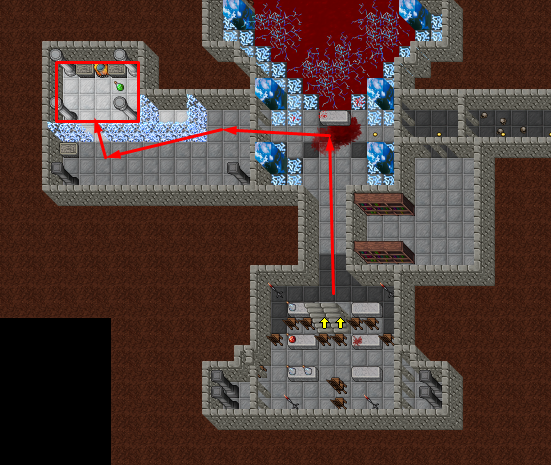
- Say "hi", followed by "yes" after he's done speaking. He will give you two empty Vial, but you don't need them as you've already brought along the Vial of Slime and Vial of Blood, right?!
- Throw the empty vials he gave you, say "bye" to him, then say hi once again followed by vials, and yes.
- After he's done talking he'll give you two vials with Corrupted Blood, that's your cue to head back to Fasha once again and speak to her for another mission.
Mission 7
- You need to find two Black Basins and pour Corrupted Blood into them. (If you are with a team everyone will need to fill the basins, the time for basin to drain is roughly 1 minute.)
- The first one is located in the southern part behind sealed doors. Go downstairs south from Fasha and follow the maps below:
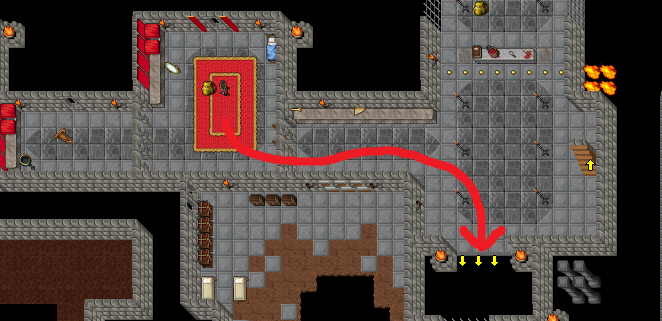 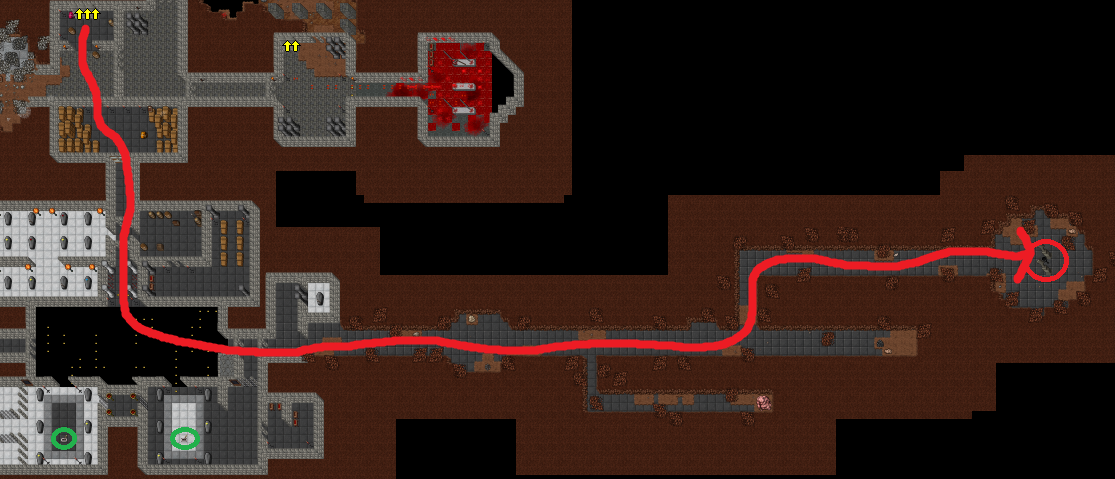
- On the way you would have to cross an invisible bridge which might be a little tricky. Also there are 2 levers(green circles on the map above) to be pulled to unlock the further way.
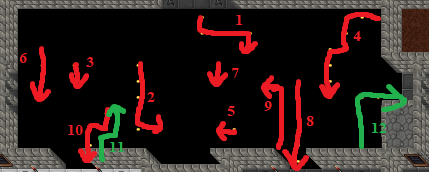
- Second basin is located in northern part of the citadel.
- You need to right-click two Coal Basins(red circles). Since the passage is open for very brief time you will need 2nd person to help you with it.
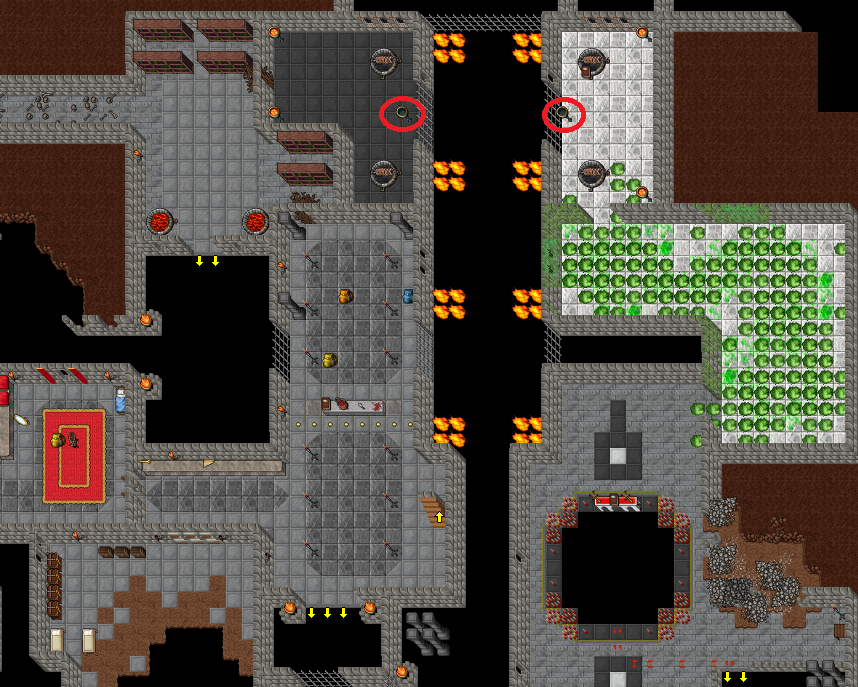
- After clicking the basins head downstairs and north. At the end of the path you need to levitate down:
- On the south you will find second Black Basin. After pouring the Corrupted Blood inside you can go back to NPC Fasha using close-by ropeplace.
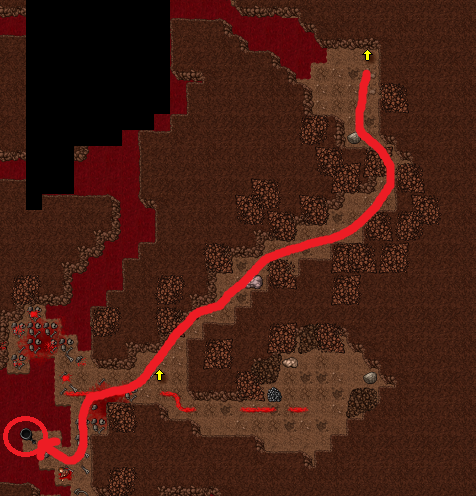
Mission 8
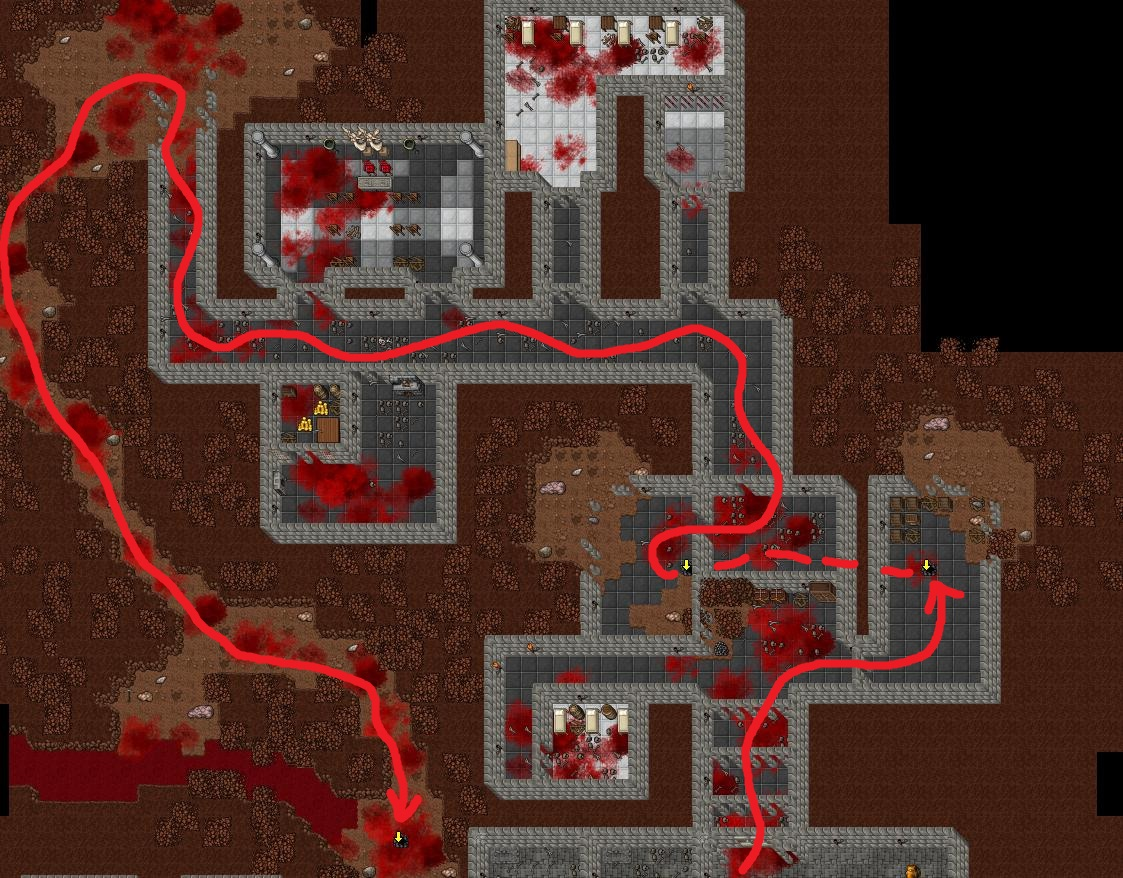
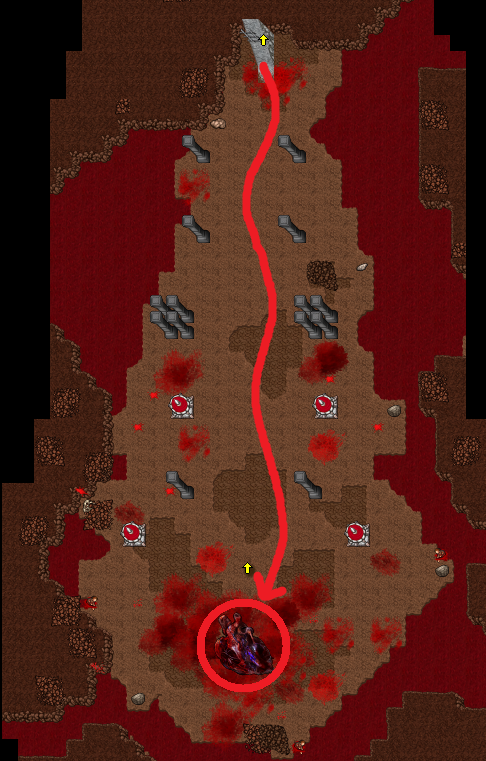
- Report back to NPC Fasha. She will ask you to find and kill The One Below.
- Go north(you will have to open the way using two Coal Basins again) and past sealed doors. At the end you will find The One's Below nest. The boss is surrounded with many Banshee, Restless Skeleton, Lich and similar creatures.
- Boss Fight Video
- After killing it speak with NPC Fasha once again. She will grant you access to the reward room which is located south from here, behind sealed doors.
- To finish the quest go back to Thoris and speak with NPC Garrant. He gives you additional 10k as the reward.
|


