Difference between revisions of "Dragon's Treasure"
| Line 11: | Line 11: | ||
Follow the path marked in red from Arak's south gate to the shovel spot to access Arak's dragon lair. Be prepared to fight several scorpions once you go down. | Follow the path marked in red from Arak's south gate to the shovel spot to access Arak's dragon lair. Be prepared to fight several scorpions once you go down. <br> | ||
[[File:Arak South Gate To Arak Dragons 1.png|left]] | [[File:Arak South Gate To Arak Dragons 1.png|left]] <br> | ||
<br> | |||
[[File:Scorpion cave 1.png|left]] | [[File:Scorpion cave 1.png|left]] <br> | ||
<br> | |||
[[File:Scorpion cave 2.png|left]] | [[File:Scorpion cave 2.png|left]] <br> | ||
<br> | |||
[[File:Scorpion cave 3.png|left]] | [[File:Scorpion cave 3.png|left]] <br> | ||
<br> | |||
[[File:Ground floor, snakes area.png|left]] | [[File:Ground floor, snakes area.png|left]] <br> | ||
<br> | |||
Beware, a single Dragon Hatchling might be lured to the stairs. | Beware, a single Dragon Hatchling might be lured to the stairs. <br> | ||
Walk over that brown stone and levitate up/place 3 parcels or boxes at the end of the path to go one floor up. Afterwards, walk around to get to the skeleton of the Dragon there. | Walk over that brown stone and levitate up/place 3 parcels or boxes at the end of the path to go one floor up. Afterwards, walk around to get to the skeleton of the Dragon there. <br> | ||
[[File:The Walkable Stone.png|left]] | <br> | ||
[[File:The Walkable Stone.png|left]]<br> | |||
[[File:Key from Dragon Skeleton.png|left]] | <br> | ||
[[File:Key from Dragon Skeleton.png|left]] <br> | |||
After you got the key, go back the way you came. Go down. Be prepared to fight a single Dragon Hatchling. | <br> | ||
After you got the key, go back the way you came. Go down. Be prepared to fight a single Dragon Hatchling.<br> | |||
[[File:Going back down.png|left]] | <br> | ||
[[File:Going back down.png|left]] <br> | |||
The ground level has a number of Dragon Hatchlings. Beware that if you click the egg then a Dragon Lord Hatchling will respawn. | <br> | ||
The ground level has a number of Dragon Hatchlings. Beware that if you click the egg then a Dragon Lord Hatchling will respawn.<br> | |||
[[File:Continued route.png|left]] | <br> | ||
[[File:Continued route.png|left]] <br> | |||
Once you go down, it is a Dragon Hatchlings cave. Follow the red path. | <br> | ||
Once you go down, it is a Dragon Hatchlings cave. Follow the red path. <br> | |||
[[File:Dragon hatchling cave 1.png|left]] | <br> | ||
[[File:Dragon hatchling cave 1.png|left]] <br> | |||
[[File:Dragon hatchling cave 2.png|left]] | <br> | ||
[[File:Dragon hatchling cave 2.png|left]] <br> | |||
[[File:Dragon hatchling cave 3.png|left]] | <br> | ||
[[File:Dragon hatchling cave 3.png|left]] <br> | |||
Rope spot leads to the surface of Arak's dragon lair, north respawn. Here any number of dragons might be lured. But overall, if not lured, it's possible not to even encounter one dragon. | <br> | ||
Rope spot leads to the surface of Arak's dragon lair, north respawn. Here any number of dragons might be lured. But overall, if not lured, it's possible not to even encounter one dragon. <br> | |||
[[File:Dragon Lair surface.png|left]] | <br> | ||
[[File:Dragon Lair surface.png|left]] <br> | |||
Levitate up and then down. Click the lava spot in order to go down. | <br> | ||
Levitate up and then down. Click the lava spot in order to go down. <br> | |||
[[File:2x Levitation.png|left]] | <br> | ||
[[File:2x Levitation.png|left]] <br> | |||
Now, use the key you got in order to unlock the quest door. | <br> | ||
Now, use the key you got in order to unlock the quest door. <br> | |||
[[File:Key door.png|left]] | <br> | ||
[[File:Key door.png|left]] <br> | |||
Now you'd find out the path is blocked by lava as marked in the red circle in the picture. The trick to open the path is to walk over the lava as shown in the pictures, and click the lava hole to turn it on (if it's turned on already then the path is open already). | <br> | ||
[[File:Path Blocked By Lava.png|left]] | |||
[[File:Walkable Lava and Clickable Lava Hole.png|left]] | <br> | ||
Now you'd find out the path is blocked by lava as marked in the red circle in the picture. The trick to open the path is to walk over the lava as shown in the pictures, and click the lava hole to turn it on (if it's turned on already then the path is open already). <br> | |||
Now you the path is opened. Go ahead and go up until you reach ground floor. No turns to get lost in. There is only one path to follow. | <br> | ||
[[File:Walkable Lava and Clickable Lava Hole.png|left]] <br> | |||
[[File:Path opened.png|left]] | <br> | ||
Now you the path is opened. Go ahead and go up until you reach ground floor. No turns to get lost in. There is only one path to follow.<br> | |||
Beware that one Dragon Lord, one Dragon, one Dragon Lord Hatchling, and one Dragon Hatchling will respawn once someone level 40+ clicks the big treasure chest. The rest of the items on the floor cannot be moved/taken. | <br> | ||
[[File:Path opened.png|left]]<br> | |||
[[File:Treasure Room.png|left]] | <br> | ||
Beware that one Dragon Lord, one Dragon, one Dragon Lord Hatchling, and one Dragon Hatchling will respawn once someone level 40+ clicks the big treasure chest. The rest of the items on the floor cannot be moved/taken. <br> | |||
<br> | |||
[[File:Treasure Room.png|left]]<br> | |||
<br> | |||
Revision as of 11:09, 27 August 2021
| Dragon's Treasure | |
|---|---|
| This article may contain quest spoiling information You may choose to show or hide this information. | |
| Known as: | Arak Dragon's Treasure |
| Reward: | 26 Platinum Coins, 4 Small Diamonds, White Pearl, 3 Small Sapphires, 4 Small Emeralds, 2 Small Rubies, and 3 Small Amethysts |
| Location: | Arak South dragon spawn. |
| Level required: | 40 |
| Be prepared to face: | Dragon, Dragon Lord |
| Legend: | Never get between a dragon and their treasure |
Go back to Quests.
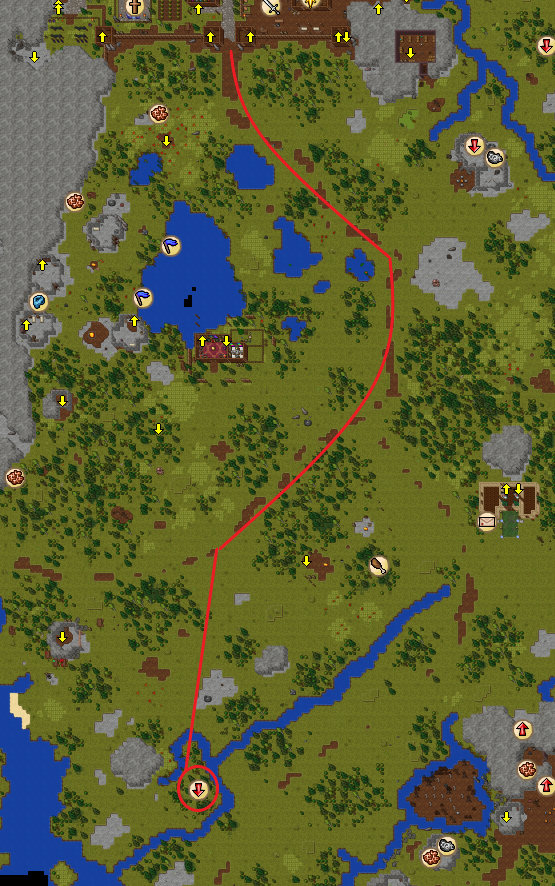
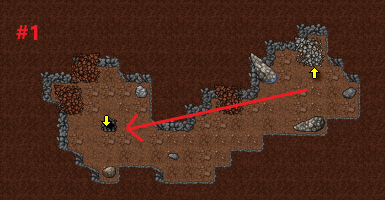
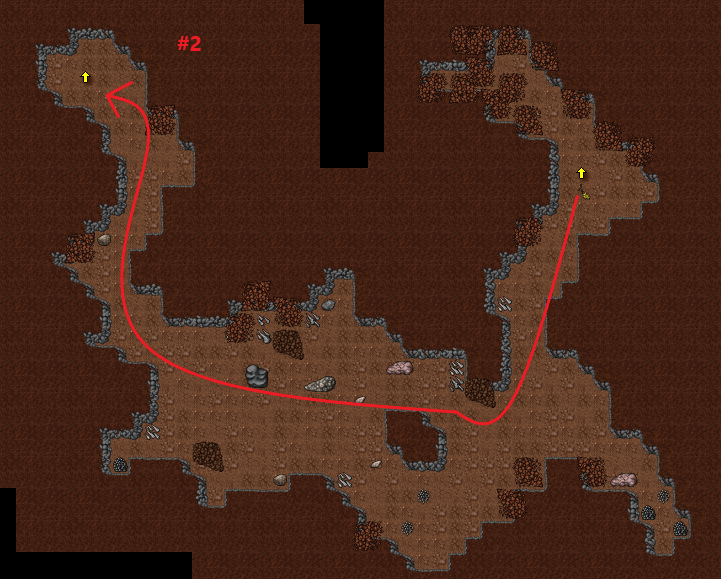
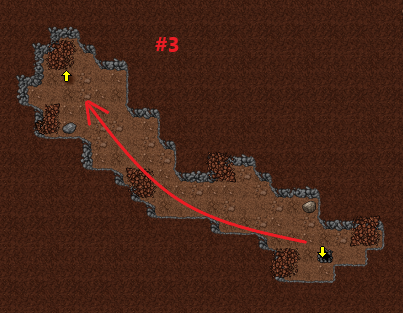
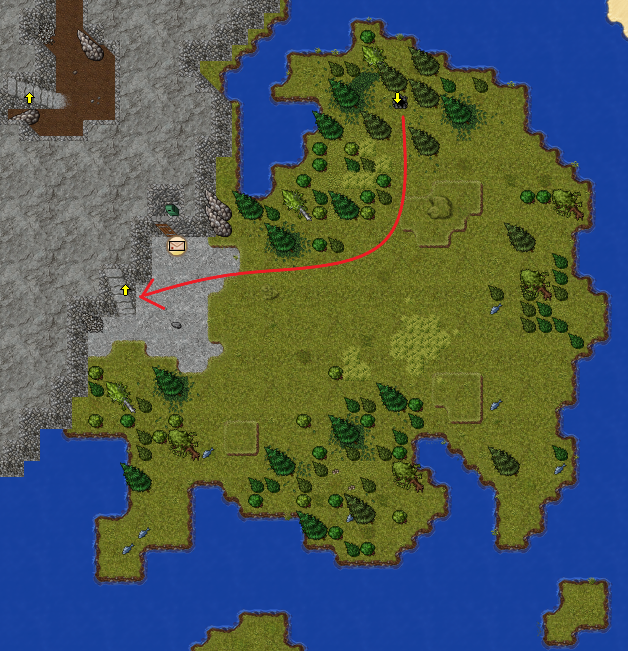
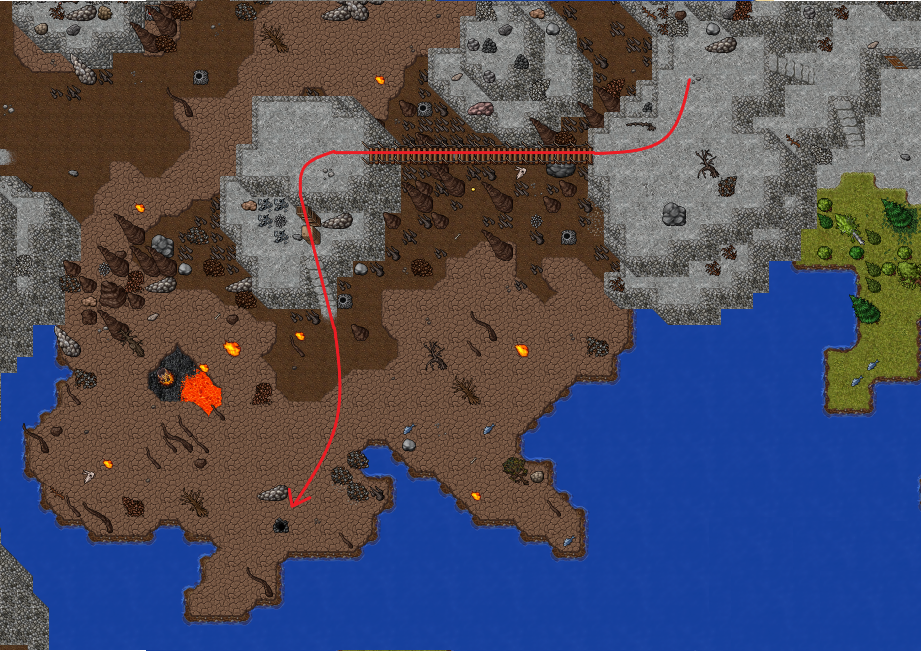
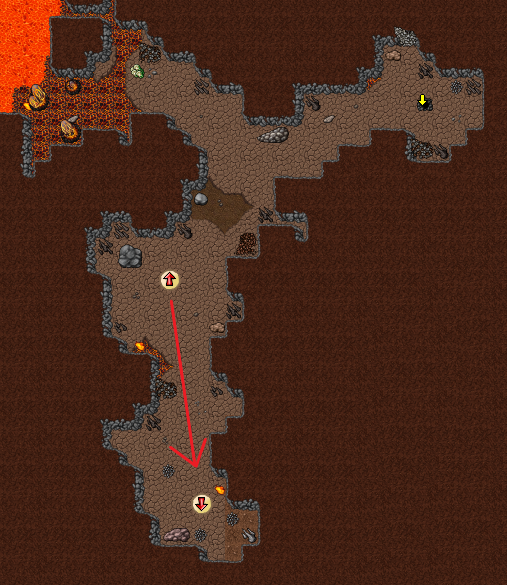
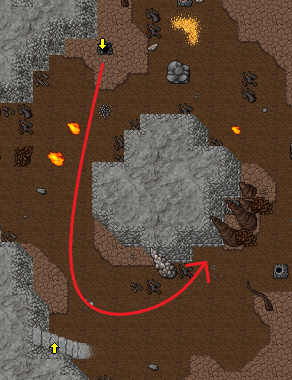
Follow the path marked in red from Arak's south gate to the shovel spot to access Arak's dragon lair. Be prepared to fight several scorpions once you go down.
Beware, a single Dragon Hatchling might be lured to the stairs.
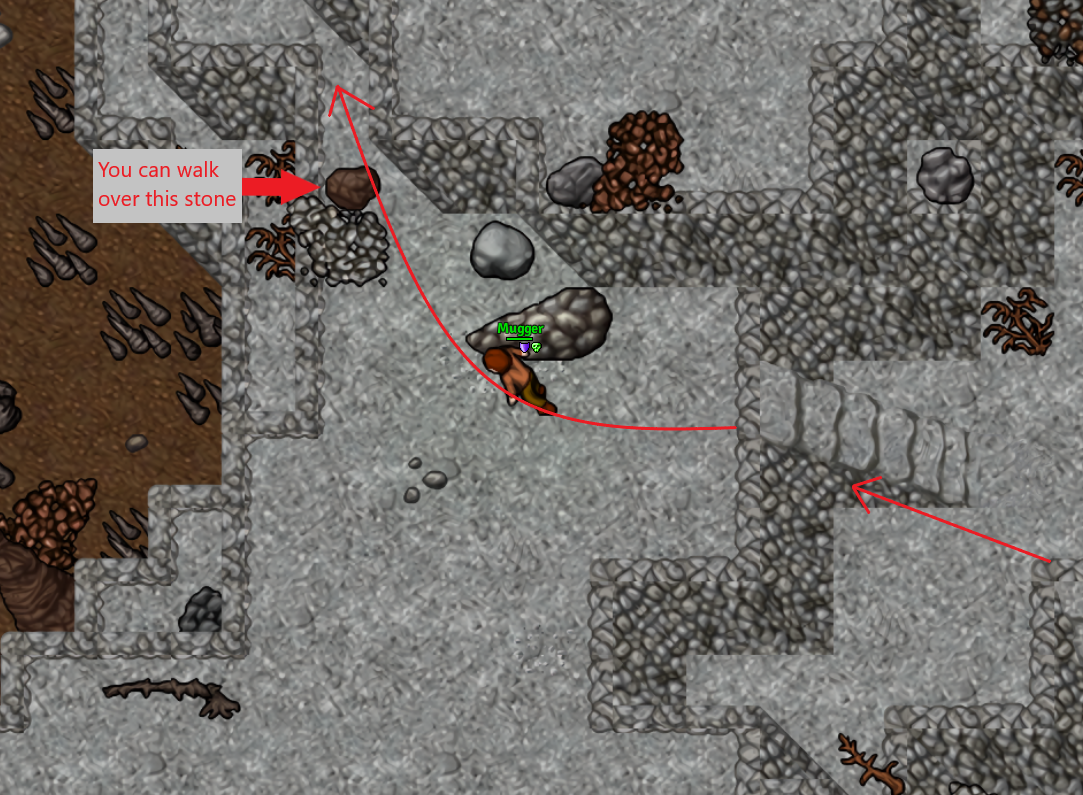
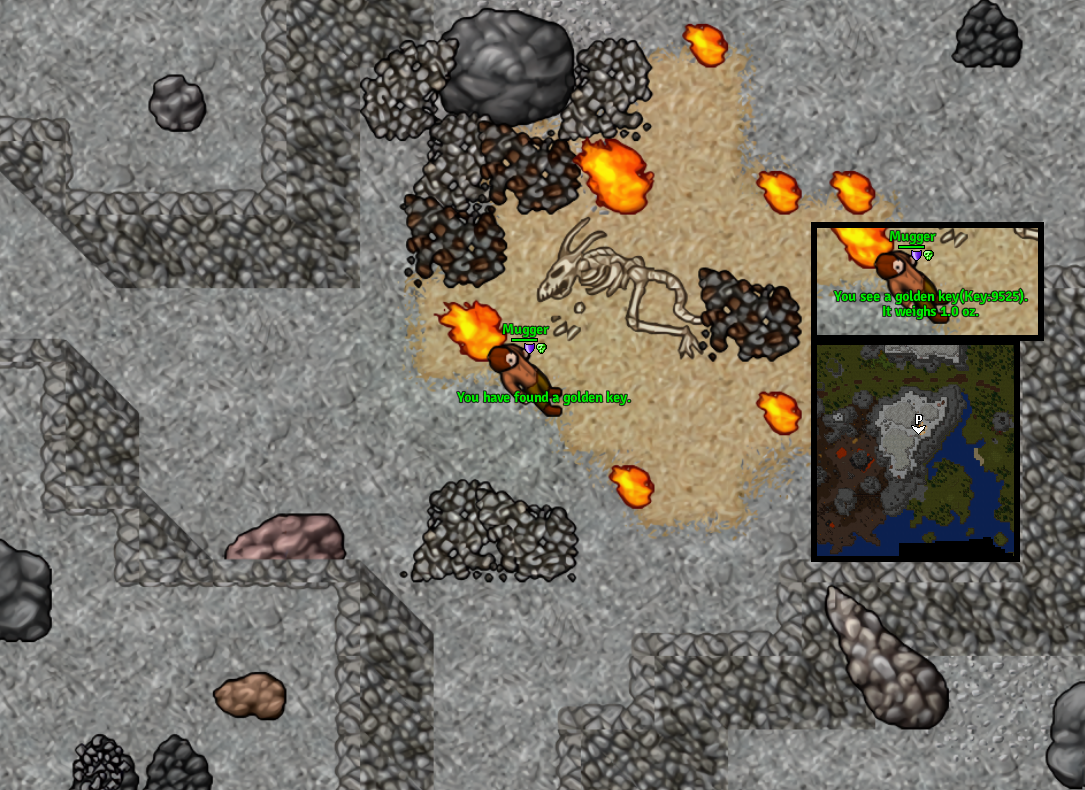
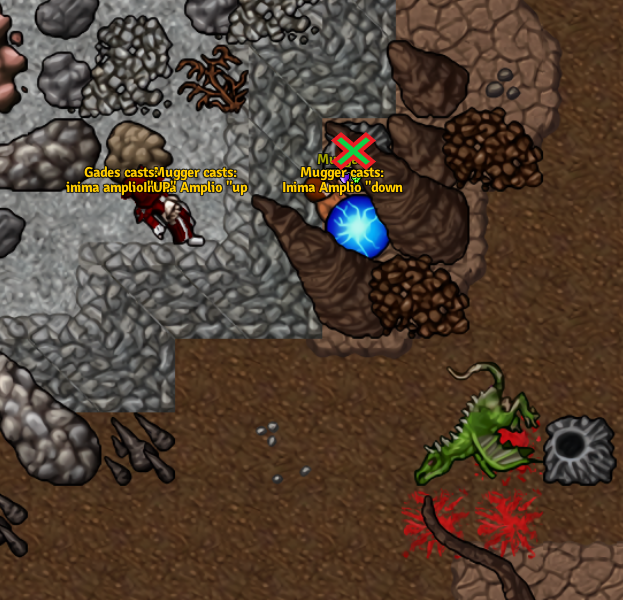
Walk over that brown stone and levitate up/place 3 parcels or boxes at the end of the path to go one floor up. Afterwards, walk around to get to the skeleton of the Dragon there.
After you got the key, go back the way you came. Go down. Be prepared to fight a single Dragon Hatchling.
The ground level has a number of Dragon Hatchlings. Beware that if you click the egg then a Dragon Lord Hatchling will respawn.
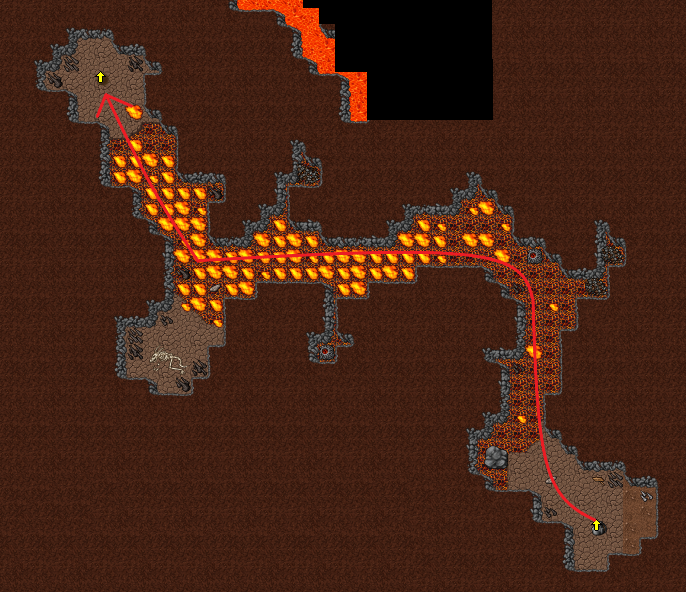
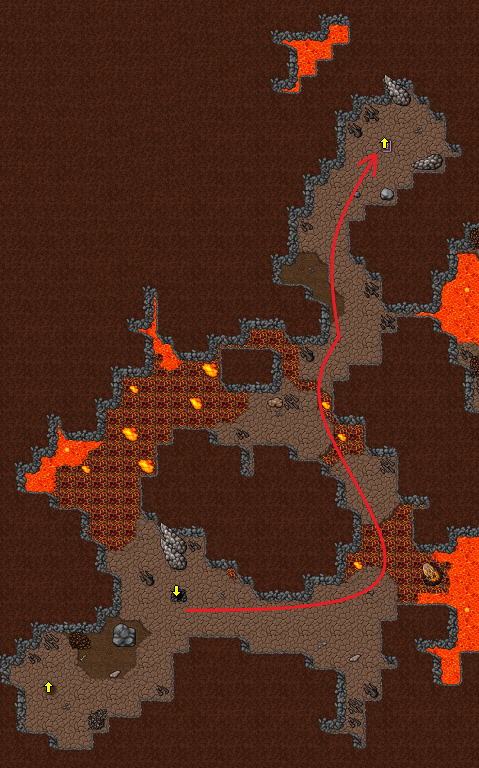
Once you go down, it is a Dragon Hatchlings cave. Follow the red path.
Rope spot leads to the surface of Arak's dragon lair, north respawn. Here any number of dragons might be lured. But overall, if not lured, it's possible not to even encounter one dragon.
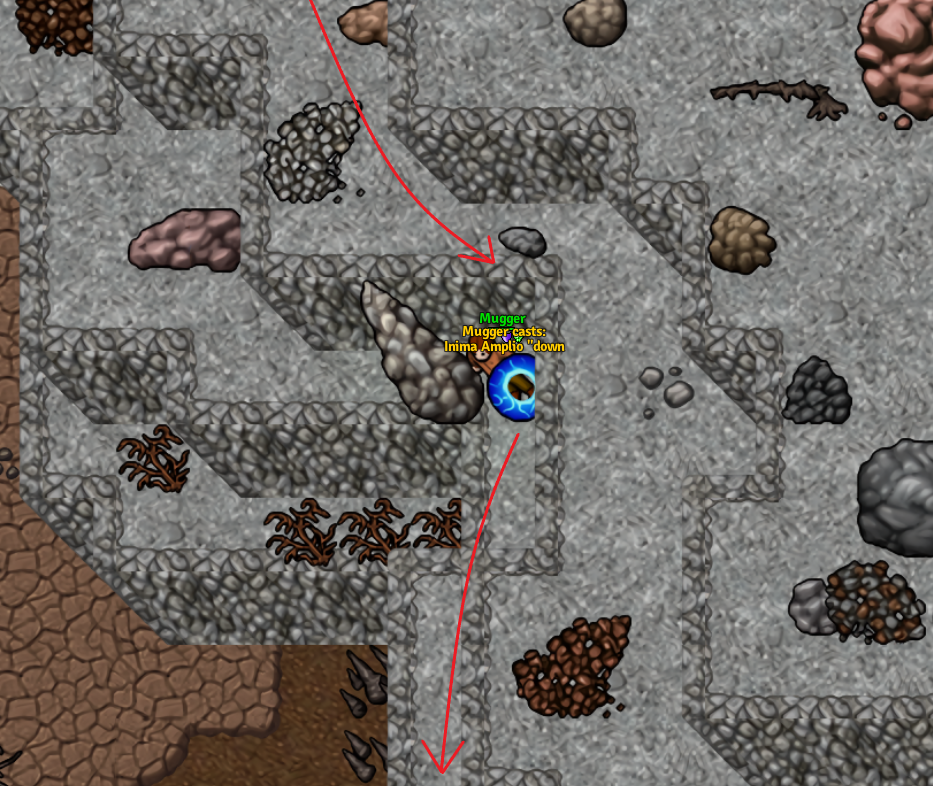
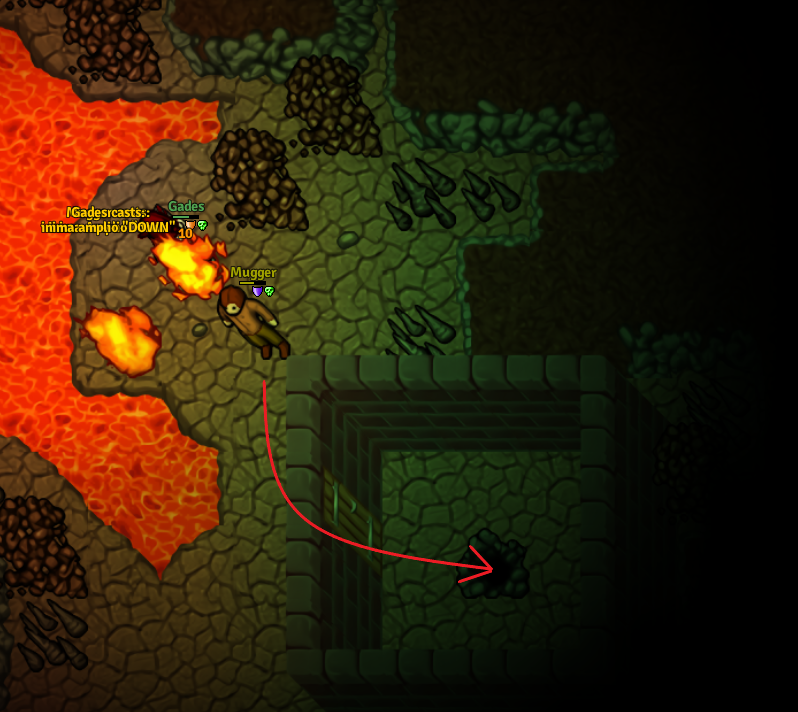
Levitate up and then down. Click the lava spot in order to go down.
Now, use the key you got in order to unlock the quest door.
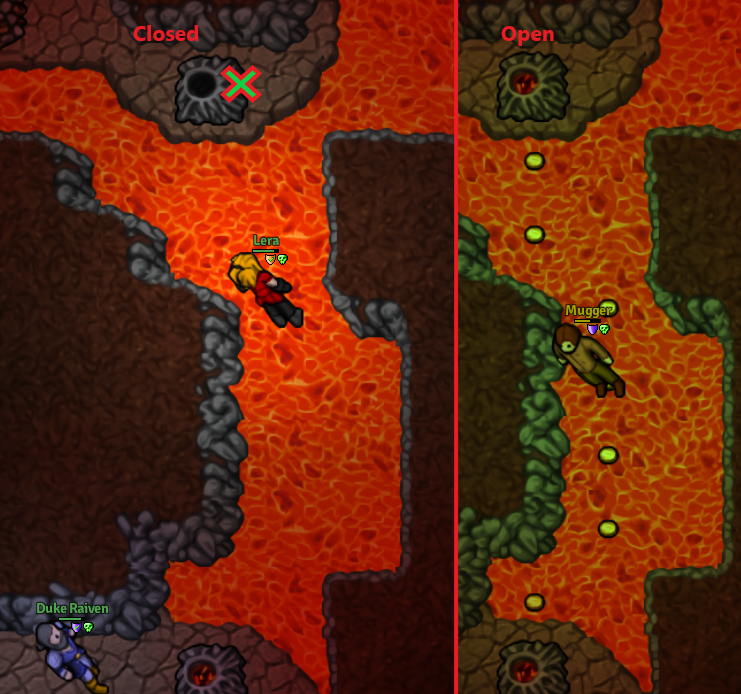
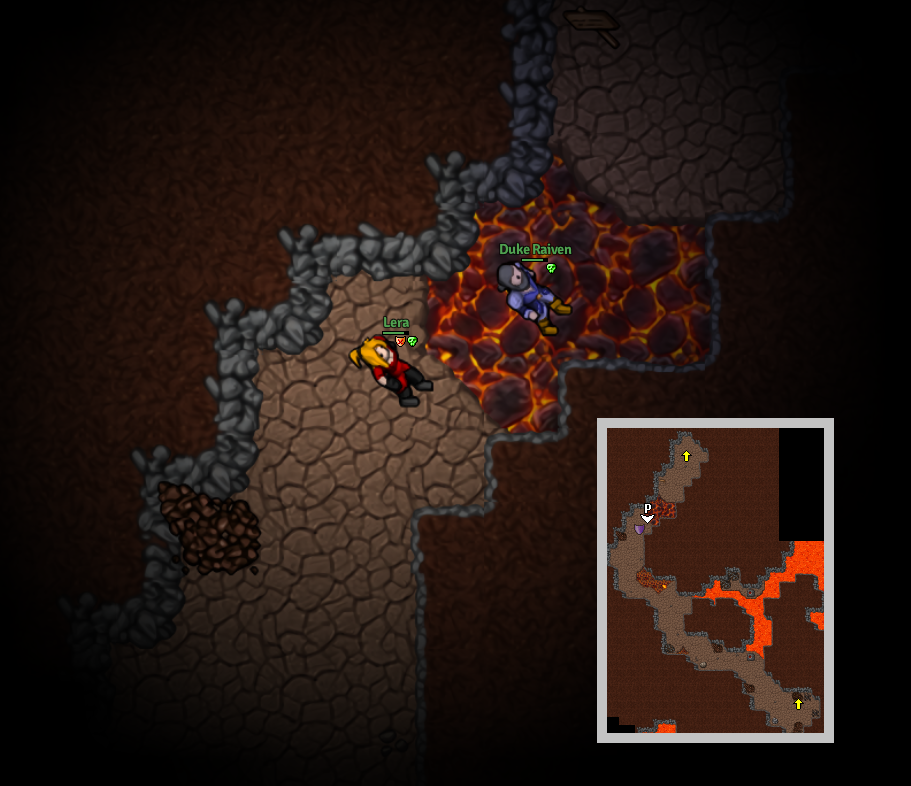
Now you'd find out the path is blocked by lava as marked in the red circle in the picture. The trick to open the path is to walk over the lava as shown in the pictures, and click the lava hole to turn it on (if it's turned on already then the path is open already).
Now you the path is opened. Go ahead and go up until you reach ground floor. No turns to get lost in. There is only one path to follow.
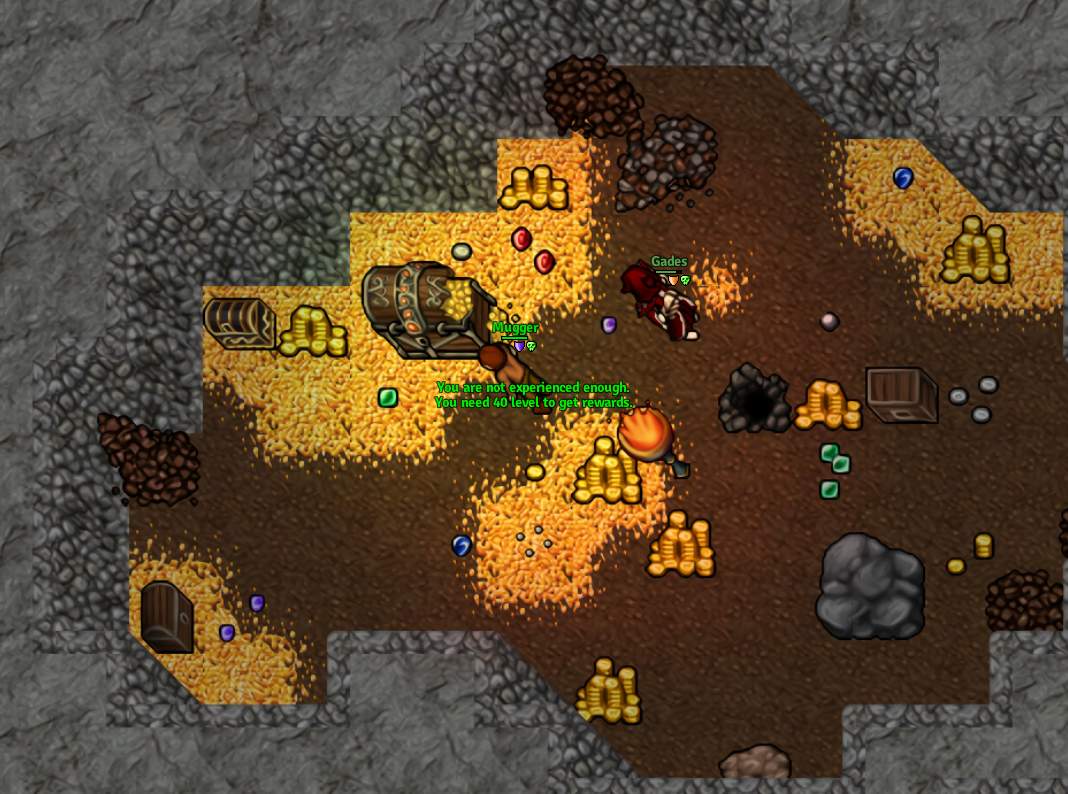
Beware that one Dragon Lord, one Dragon, one Dragon Lord Hatchling, and one Dragon Hatchling will respawn once someone level 40+ clicks the big treasure chest. The rest of the items on the floor cannot be moved/taken.
