Difference between revisions of "The Plaguebringers of Abukir"
(Lots of info added) |
(Some more stuff) |
||
| Line 74: | Line 74: | ||
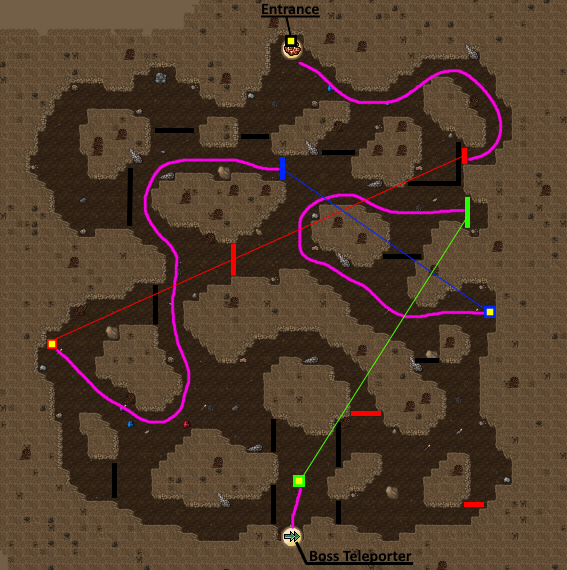
*[[Media:Energysealmap.png|Seal Map]] - [https://www.youtube.com/watch?v=tnjN-TTE-U8 Video] | *[[Media:Energysealmap.png|Seal Map]] - [https://www.youtube.com/watch?v=tnjN-TTE-U8 Video] | ||
<br /> | <br /> | ||
The Energy Seal is full of [[Warlock]]s and [[Unstable Electricity]]. The Warlocks go invisible often and have a lot of room to run and hide while shooting the team, while the Unstable Electricity requires coordinated damage in a small time frame before they heal right back to full health. | |||
To pass this seal easily without simply being high level, requires a leader to coordinate the team well - to lead them on the correct path, combo the Unstable Electricity efficiently, and to leave no Warlock untouched. | |||
<br /> | |||
The fight with Tempestas is one of the more difficult ones of this quest. There are 2 reasons for this: | |||
*Every second there will be a line of energy along the axis of both an X coordinate and a Y coordinate. Considering the arena is a 15x15 grid, you have about a 13% to get hit for 350 energy damage, each second. This means there is a 0.45% to double hit a specific sqm for 700 damage. Keep in mind this chance is for any individual sqm, and the more sqms your team takes up the higher the chance of someone taking the combo. | |||
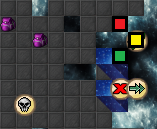
*Tempestas himself can deal a significant combo (5000+). It is highly unlikely for him to use all of his abilities together, and even more unlikely for them to all hit for their upper range of damage, but it is possible and you need to prepare for such a time with as much energy resistance as you can. Block him [[Media:Tempestasspot.png|here]], stepping on either the red or green tiles, going diagonal to the yellow, then going diagonal again to the opposite tile. This will make him face either up or down so his beam cannot hit the shooters as well as keeping him in a position that if he changes target he'll be forced to go diagonal and take longer. | |||
<br /> | <br /> | ||
'''Quest Service Help'''<br /> | '''Quest Service Help'''<br /> | ||
The seal isn't particularly dangerous for people to help shoot here and there, just mind the invisible [[Warlock]]s and [[Unstable Electricity]]'s aoe damage and fast movement speed. When inside [[Tempestas]]' chamber, it is easiest to keep the shooters stacked on the teleport and have someone use [[Mass Healing]] to keep them alive when the stack gets hit. As each hit will deal 350 energy damage and it's possible to be hit from both the X and Y axis, low level mages can instantly die in an unlucky combo for 700 damage. If you don't have much firepower, give them a [[Might Ring]] and [[Strange Talisman]] to survive, otherwise just let them use [[ | The seal isn't particularly dangerous for people to help shoot here and there, just mind the invisible [[Warlock]]s and [[Unstable Electricity]]'s aoe damage and fast movement speed. When inside [[Tempestas]]' chamber, it is easiest to keep the shooters stacked on the teleport and have someone use [[Mass Healing]] to keep them alive when the stack gets hit. As each hit will deal 350 energy damage and it's possible to be hit from both the X and Y axis, low level mages can instantly die in an unlucky combo for 700 damage. If you don't have much firepower, give them a [[Might Ring]] and [[Strange Talisman]] to survive, otherwise just let them use [[Magic Shield]] and pray the boss dies first. | ||
<br /> | <br /> | ||
=='''Death Seal & Mortem'''== | =='''Death Seal & Mortem'''== | ||
Revision as of 11:22, 4 June 2024

|
The Plaguebringers of Abukir Quest | |
|---|---|---|
| Reward: | For everyone: Quicksand Boots and an Ancient Backpack. Choice between one of three items: Soul Emerald, Ancient Crossbow and Magician's Staff. | |
| Location: | Abukir. | |
| Level required: | 100+ (minimum), 150+ recommended | |
| Be prepared to face: | Chimera, Undead Dragon, Abomination, Wight, Manticore, Banshee, Lich, Shattered Soul, Priestess, Necromancer, Fire Elemental, Fire Devil, Revenant, Mons, Ignis, Harenam, Suffocent, Terraemotus, Tempestas, Mortem. | |
| Legend: | The Gods of Abukir have been causing misery and destruction on the people of Abukir for too long. It's time to put a stop to their reign of terror. | |
| Method: | ||
Video of the questRequirements
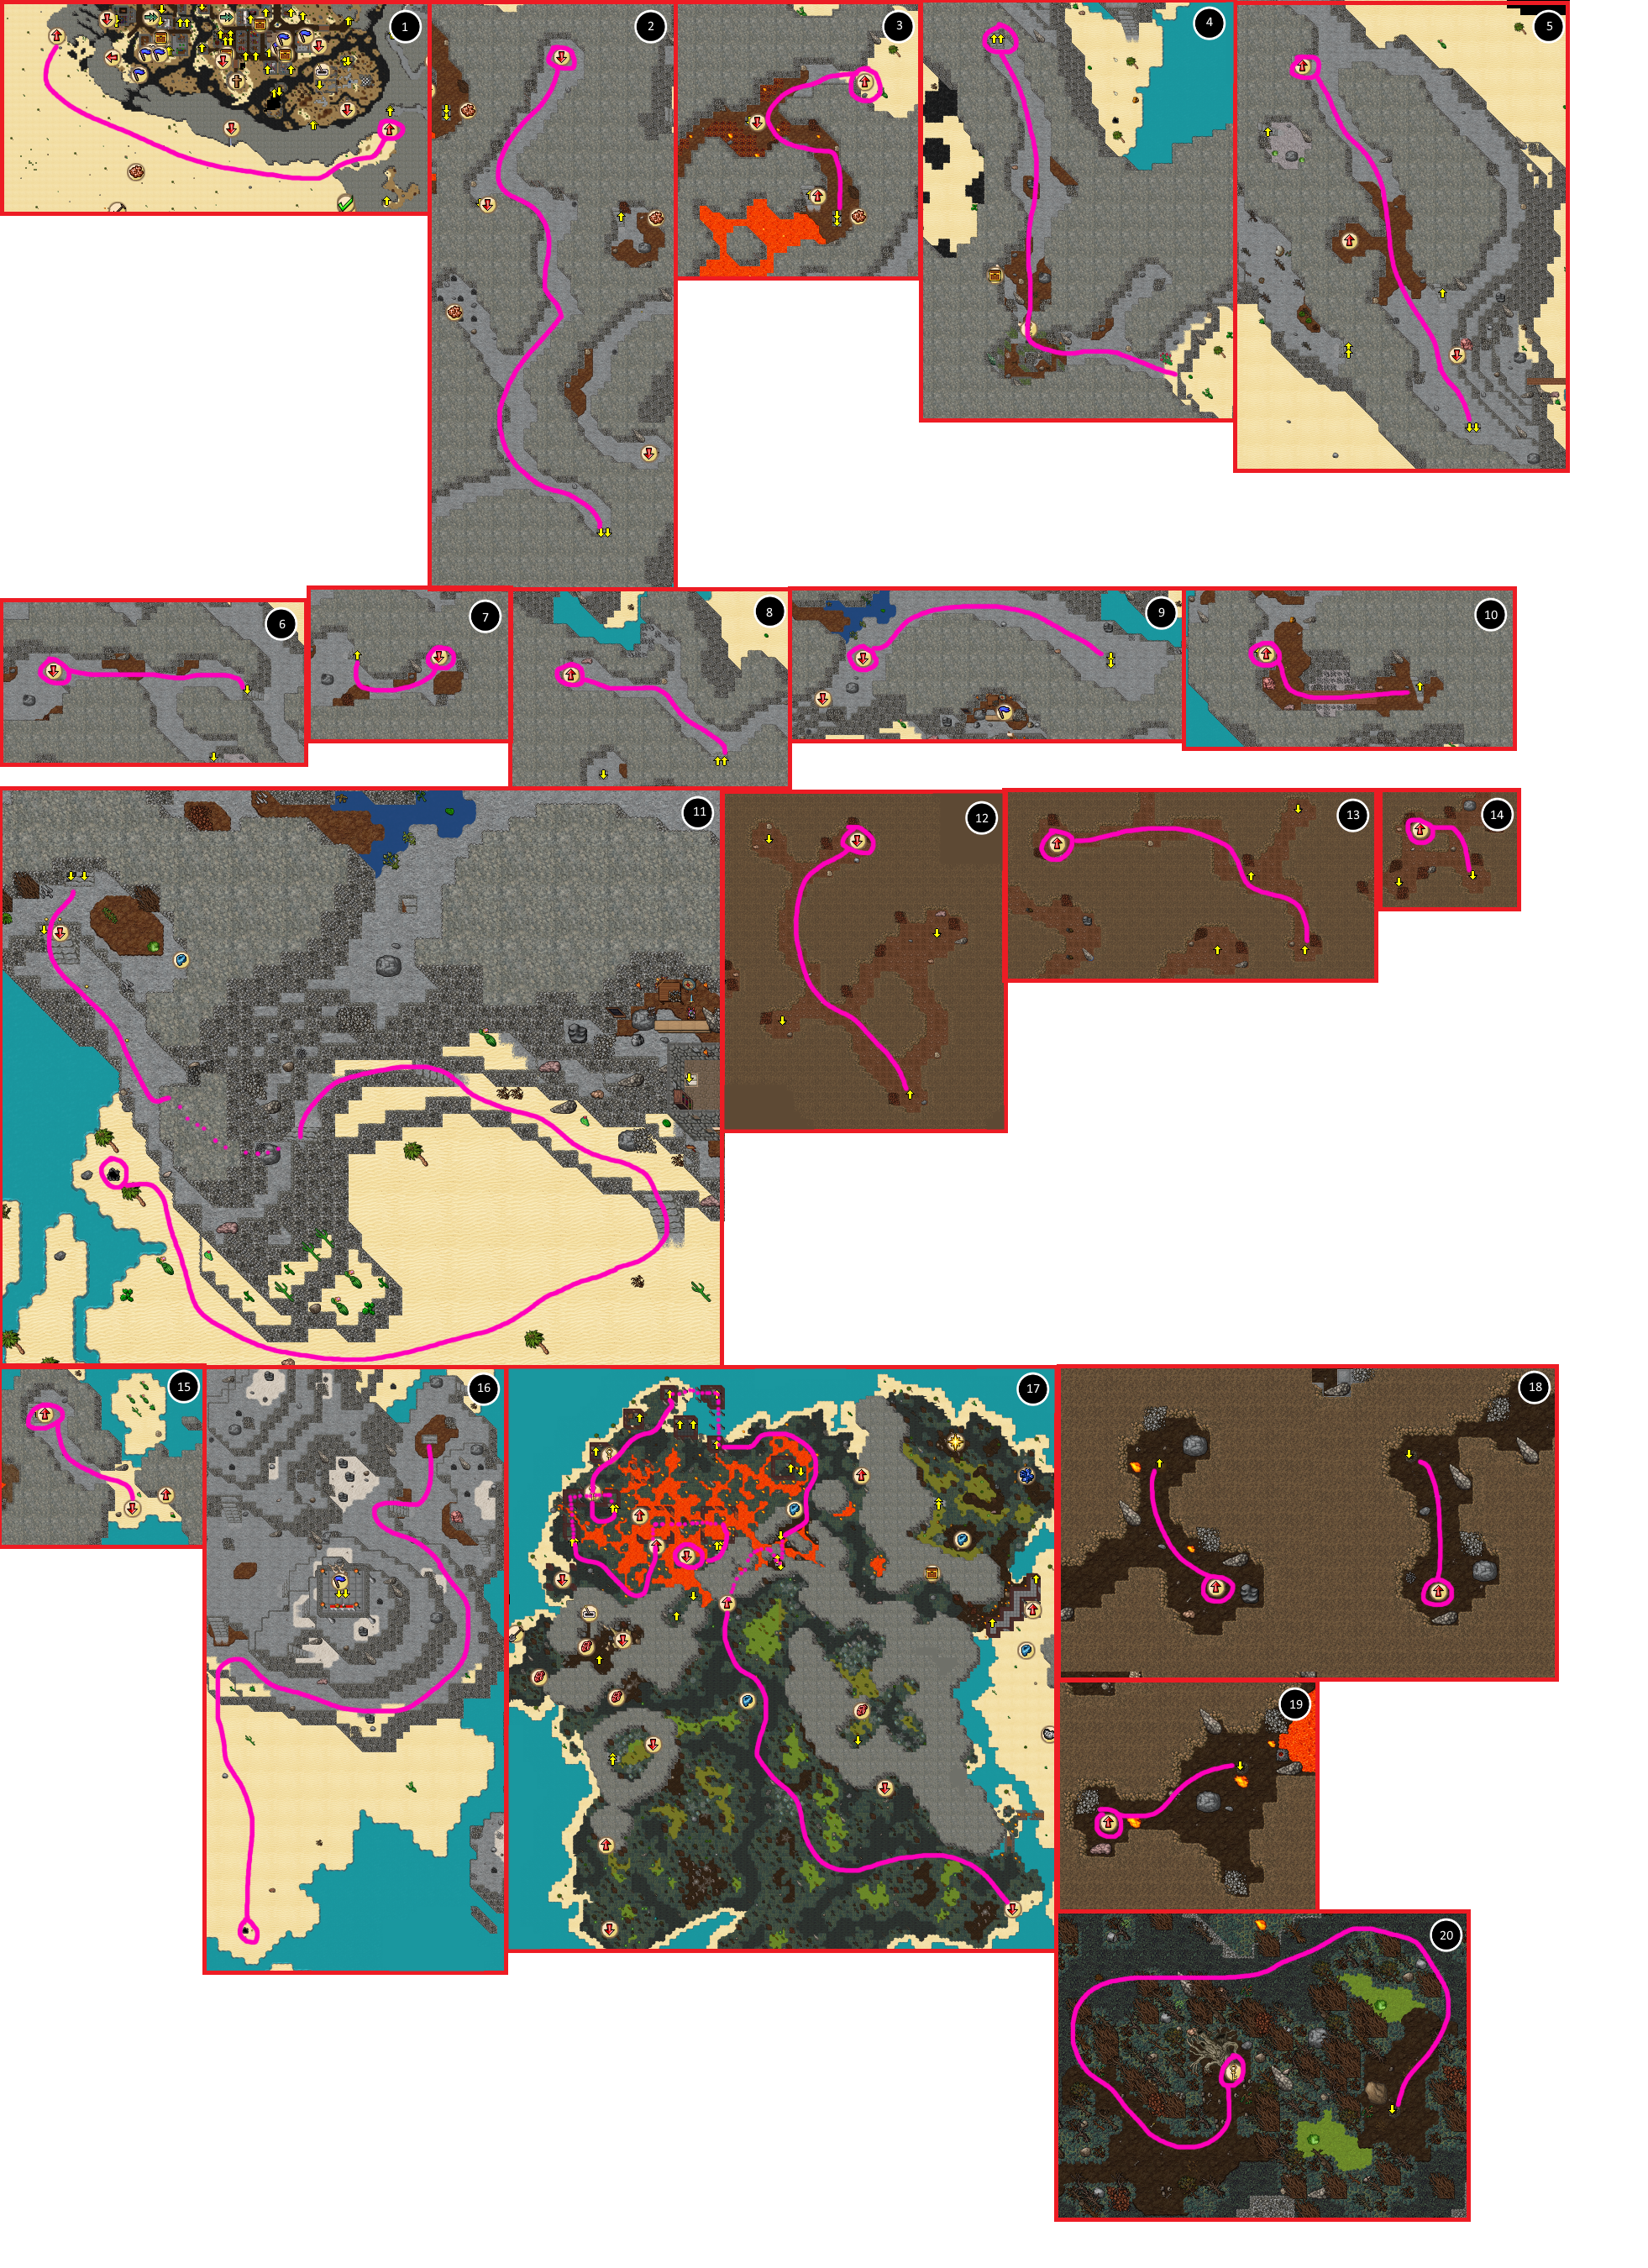
Route to PoA area and entrance part
Mountain Seal & Mons
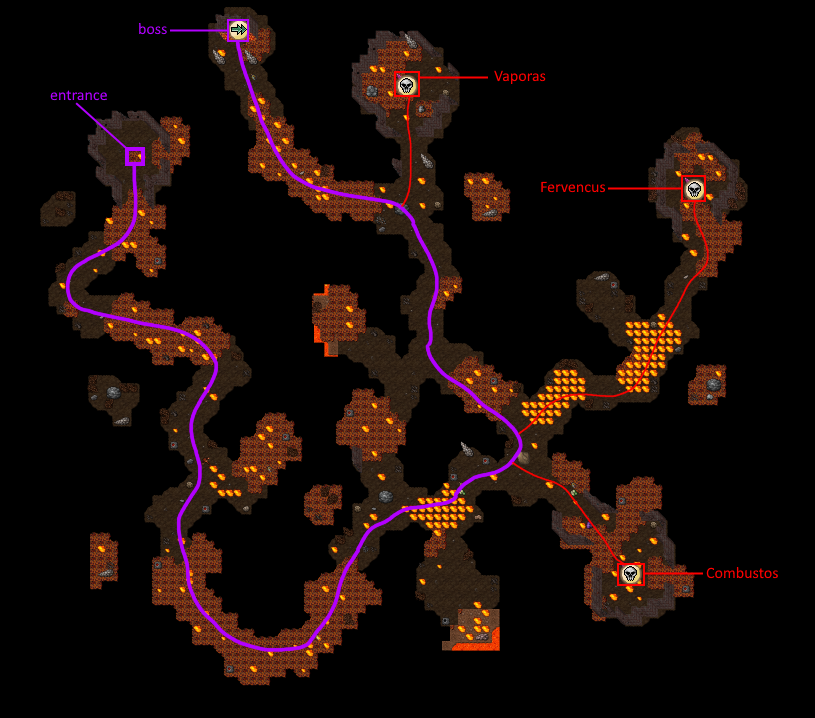
Fire Seal & Ignis
Sand Seal & Harenam
Tar Seal & Suffocent
Earth Seal & Terraemotus
Energy Seal & Tempestas
To pass this seal easily without simply being high level, requires a leader to coordinate the team well - to lead them on the correct path, combo the Unstable Electricity efficiently, and to leave no Warlock untouched.
Death Seal & MortemIn order to enter this seal you must have completed the previous 6 seals. This doesn't need to be on the same day, just that at some point you need to have completed the other seals.
It's likely that you could find up to 3 of anything on this list, but this is what I have found personally.
Reward RoomUpon leaving Mortem's chamber you will find yourself in the reward room. You can take both of the top two items (Quicksand Boots and Ancient Backpack), but must choose only one of the below three items (Soul Emerald, Ancient Crossbow and Magician's Staff).
| ||
