Mission 1 - Gaining Access
Link to Access Mission Page
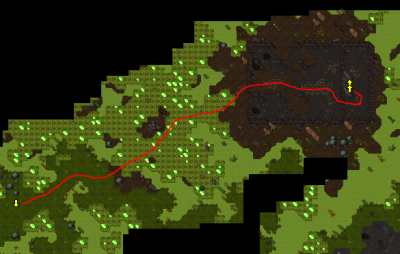
Once you've defeated all the hellgate guardians, you can access Sheol through the main hellgate in the dwarf generals area of the Mittenhoff mines. You can travel there via minecart from the main hub.

Mission 2 - Blood Witch Task
Travel east into the city of Zarrith.
The watcher guards at the gates will stop you and ask your identity, say you are 'human'.
You will be allowed to the city and directed to Arbiter Kerrin.
Arbiter Kerrin will welcome you to the watcher war effort and task you with slaying 900 Blood Witches.
There are 2 spawns of Blood Witches:
- South Blood Witch Spawn
- North Blood Witch Spawn
The reward for completing this task is 2,000,000 Experience.
Mission 3 - Freeing Molgorth
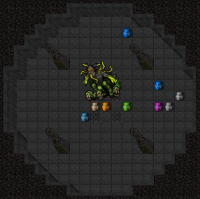
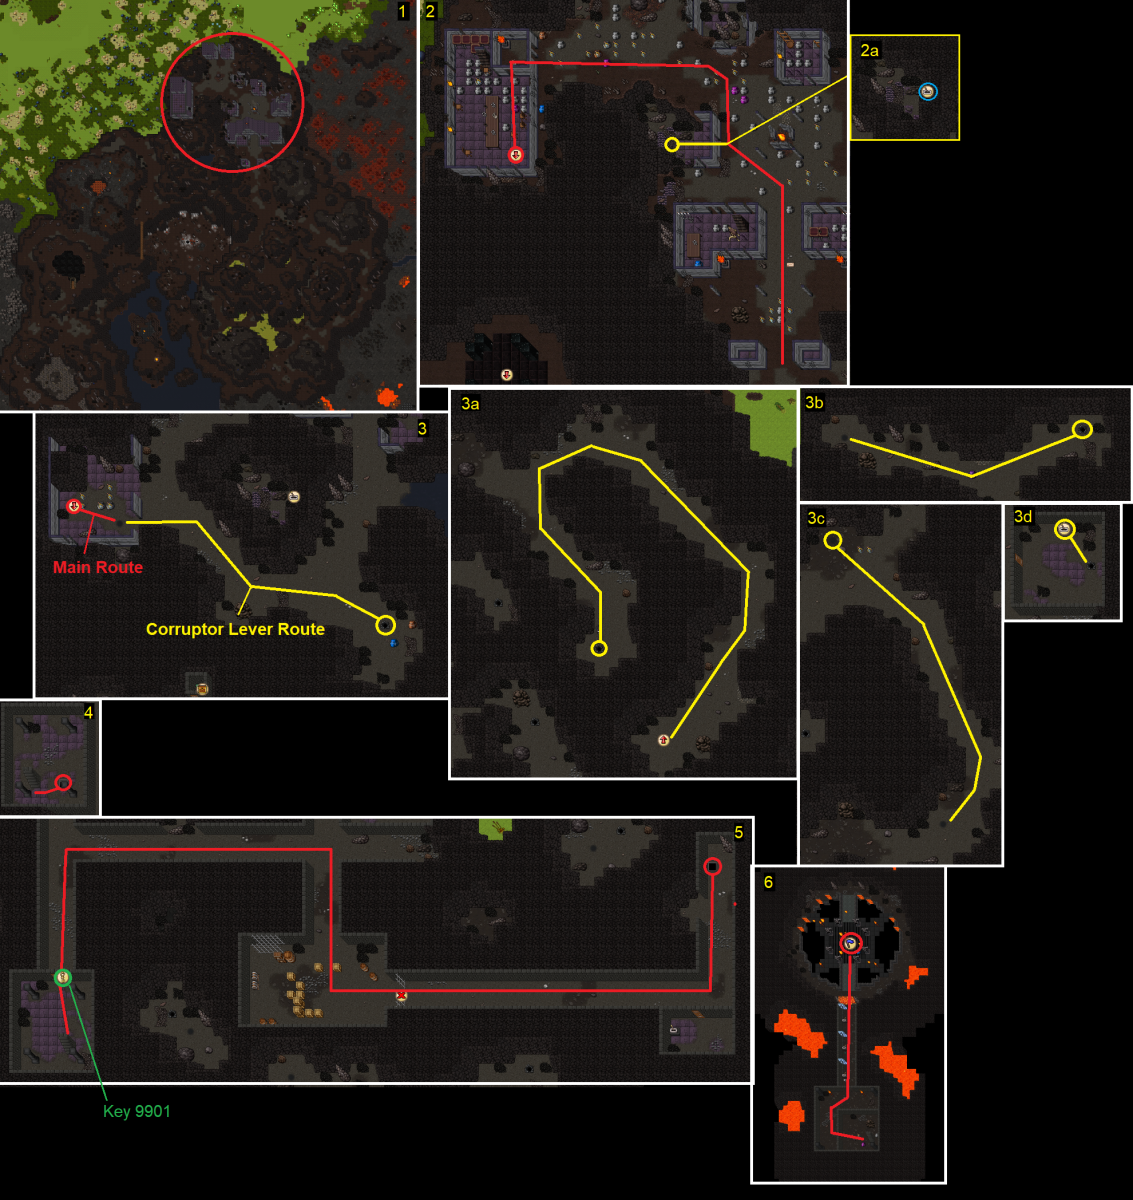
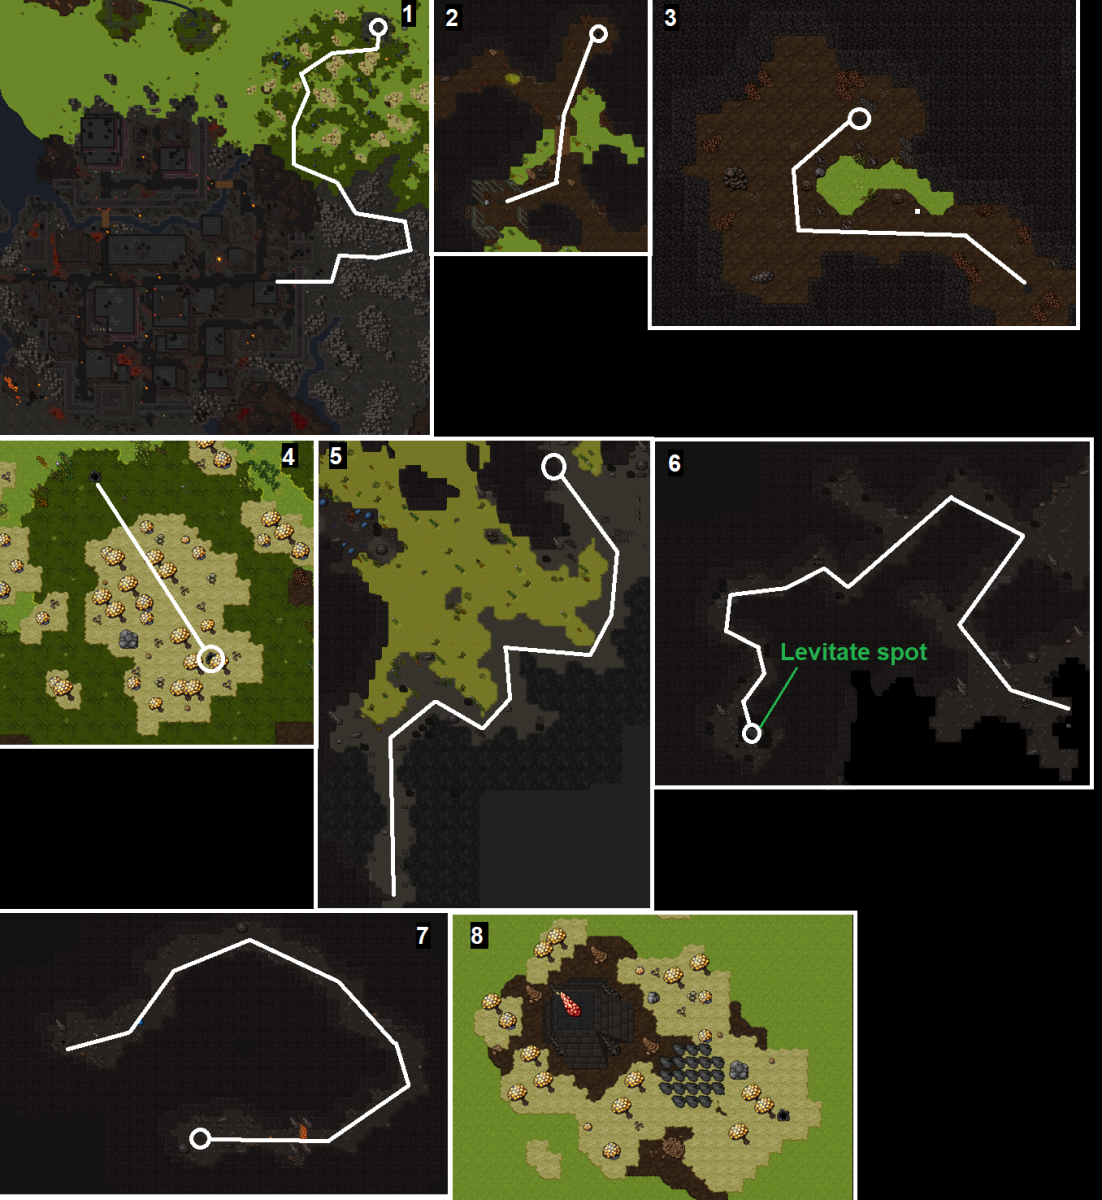
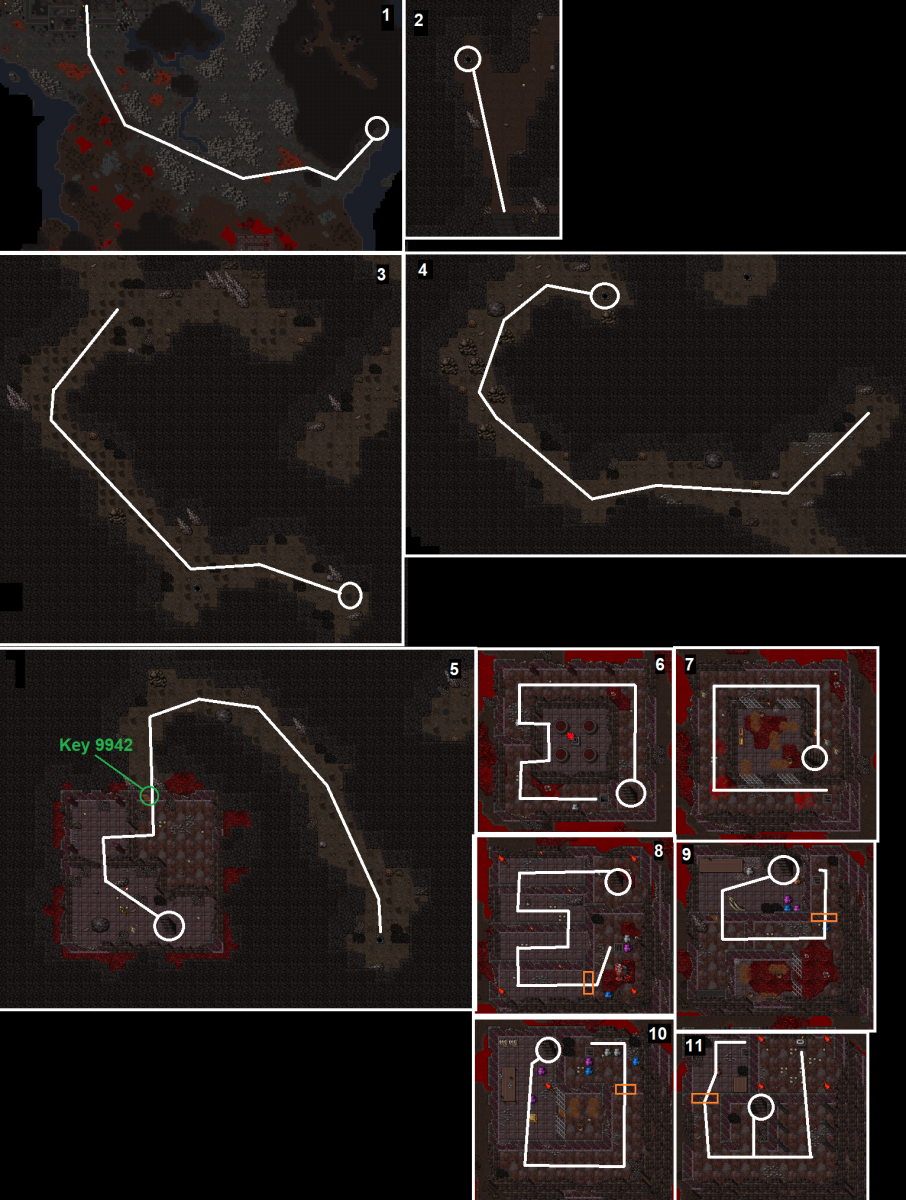
- Arbiter Kerrin will send you to speak with Molgorth in the deepest part of Torem's Court. Here's a map of how to get to him. The bottom floor of Torem's Court has a Corruptor and numerous Giant Energy Elementals so make sure to bring appropriate supplies.
- After speaking with Molgorth return to Arbiter Kerrin back in Zarrith.
- He will send you to the Sheol Library. In the deepest part with the Venerators you'll find a giant orb suspended on some pillars protected by a single Corruptor. Levitate up to the top of the pillars and use the orb to be sent back into the past.
- Return to Arbiter Kerrin in Zarrith. He'll tell you to help Molgorth.
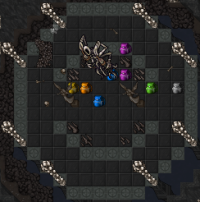
- Return to Molgorth with 8 Violet Magic Orbs that can be looted inside Torem's Court from any monster at floor -1.
Mission 3 Transcripts
|
Player: Hi
Molgorth: What brings a mortal to the lands covered in black ash?...
Molgorth: And how one stands before me with his soul intact? You are not a mere human...
Molgorth: What do you want from an ardevok trapped by magical chains?
Player: Kill
Molgorth: Now flee, before they will storm this place.
Molgorth: MY FATE WAS DECIDED THE MOMENT I HAVE ACCEPTED THE GIFT FROM MY CURSED BROTHER!...
Molgorth: The armor I am wearing is draining my life force and will keep draining it till there is none left...
Molgorth: I have been locked up here to starve. This is how devoks are treating the rightful heir to the throne...
Molgorth: Yes, I should be the one calling myself the Devok King. I was betrayed by my brother, Baalerun...
Molgorth: He tricked me into wearing this leeching armor that has made me weak and unable to escape this prison...
Molgorth: If you came here thinking that slaying me will weaken the forces of Baalerun, you are wrong! By doing this you will do Baalerun a favor...
Molgorth: See it for yourself. If you think I am lying and trying to prolong my life. Do you think I want to spend any more time here, in this prison?...
Molgorth: The watchers once owned a powerful artifact that allowed them see the past. Use it to see the truth...
Molgorth: Give me a chance to get my revenge and I shall become your ally.
Player: Mission
Arbiter Kerrin: He knows Baalerun and his commanders more than we do...
Arbiter Kerrin: The artifact he spoke of is called a soul mirror...
Arbiter Kerrin: It looks like an enormous eye, and with each gaze it feels as if your soul is being pulled into it...
Arbiter Kerrin: Everything that happened, in every place on all worlds can be seen once again by using this sacred artifact...
Arbiter Kerrin: It is hidden in the Library of the Fortunetellers, located far east of the Blood Lake...
Arbiter Kerrin: The library is not a safe place. No place is safe in the lands of Sheol...
Arbiter Kerrin: The way to the soul mirror is guarded by psychic demons who call themselves the Bookwardens...
Arbiter Kerrin: They spent most of their lives in the Library, absorbing every bit of knowledge stored in books...
Arbiter Kerrin: Very intelligent creatures. And also very dangerous...
Arbiter Kerrin: Reach the soul mirror and see the past. We must know if we can trust Molgorth.
Player: Mission
Arbiter Kerrin: I trust what you have seen, Player...
Arbiter Kerrin: Molgorth would become a powerful ally, but only if he will be freed first...
Arbiter Kerrin: I know the Temple of War very well, I know what magic is keeping prisoners in their cells...
Arbiter Kerrin: But Molgorth is not in a mere cell. He is bound by 8 enchanted demonic busts, on the lowest floor of the Temple...
Arbiter Kerrin: Disable them, and Molgorth will be able to escape the prison on his own...
Arbiter Kerrin: But the problem is you need to find the orbs first, that are needed to disable the busts...
Arbiter Kerrin: My scrying powers cannot detect the location of orbs, for they are enchanted with magic...
Arbiter Kerrin: This magic not only hides them, but also keeps them within the boundaries of the Temple...
Arbiter Kerrin: They can be carried by any devok you will find within this dungeon...
Arbiter Kerrin: Now hurry up, before the enemy will make their next move.
|
|
Mission 4 - Ashlord Task
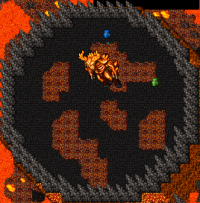
You will need to slay 850 Ashlords.
There is only 1 good Ashlord spawn:
- Ashlord Volcano
But you can also choose to hunt them at The Hellish Gate where you fight Thor'garak or Sheol Elevator
The reward for completing this task is an  Ashlord Doll.
Mission 5 - Magic Stones
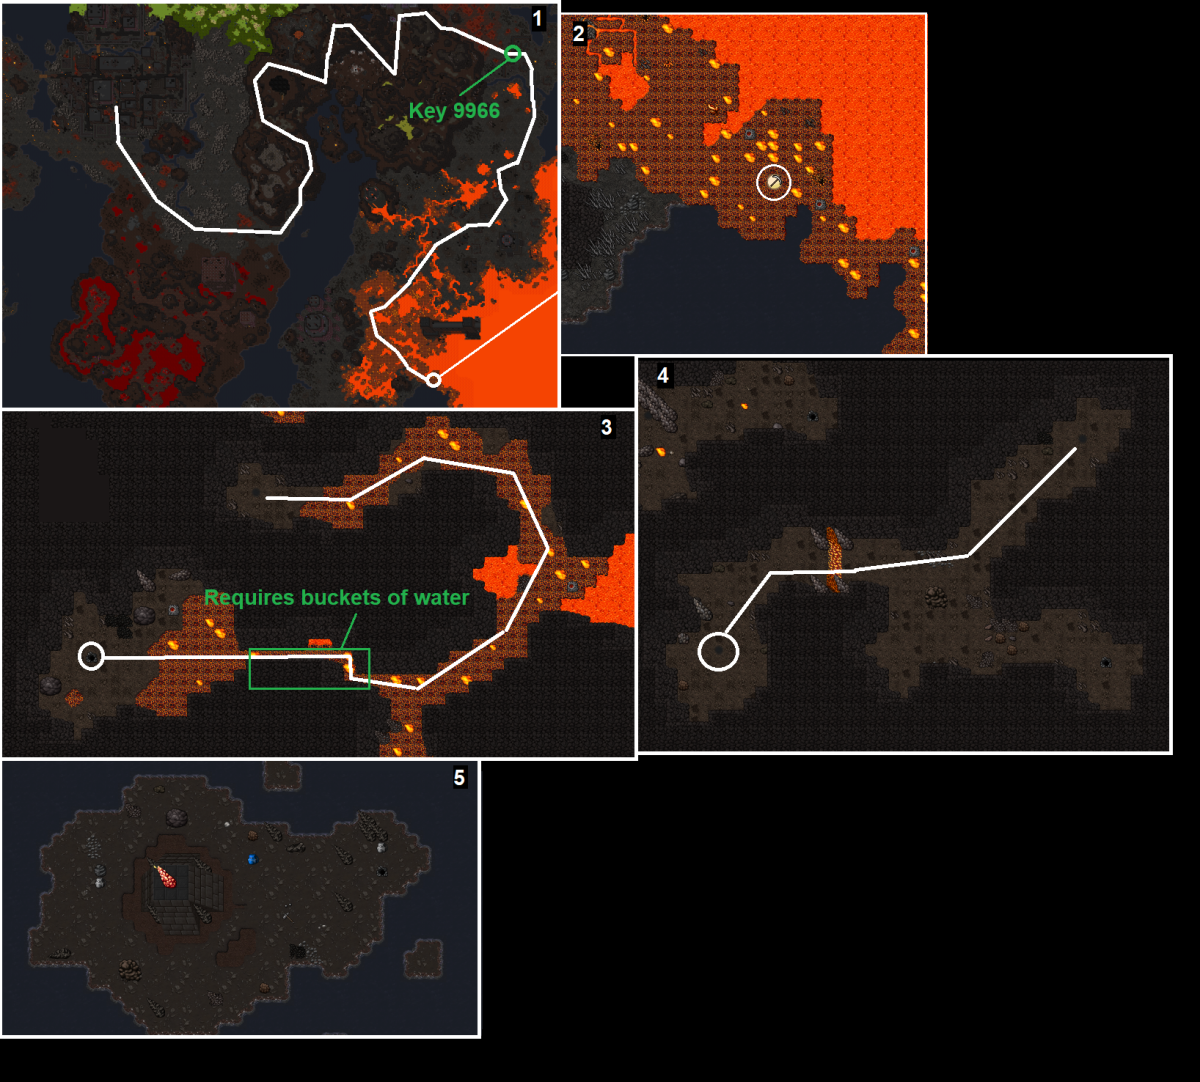
Requires Key 9966 for Magic Stone #1
Requires several buckets of water for Magic Stone #1 (Bring 10+)
You must do each of these stones in proper order.
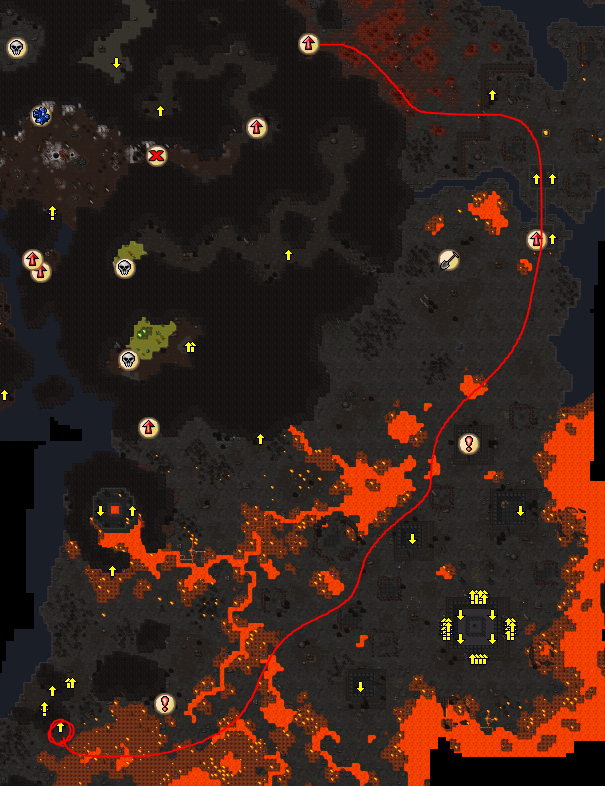
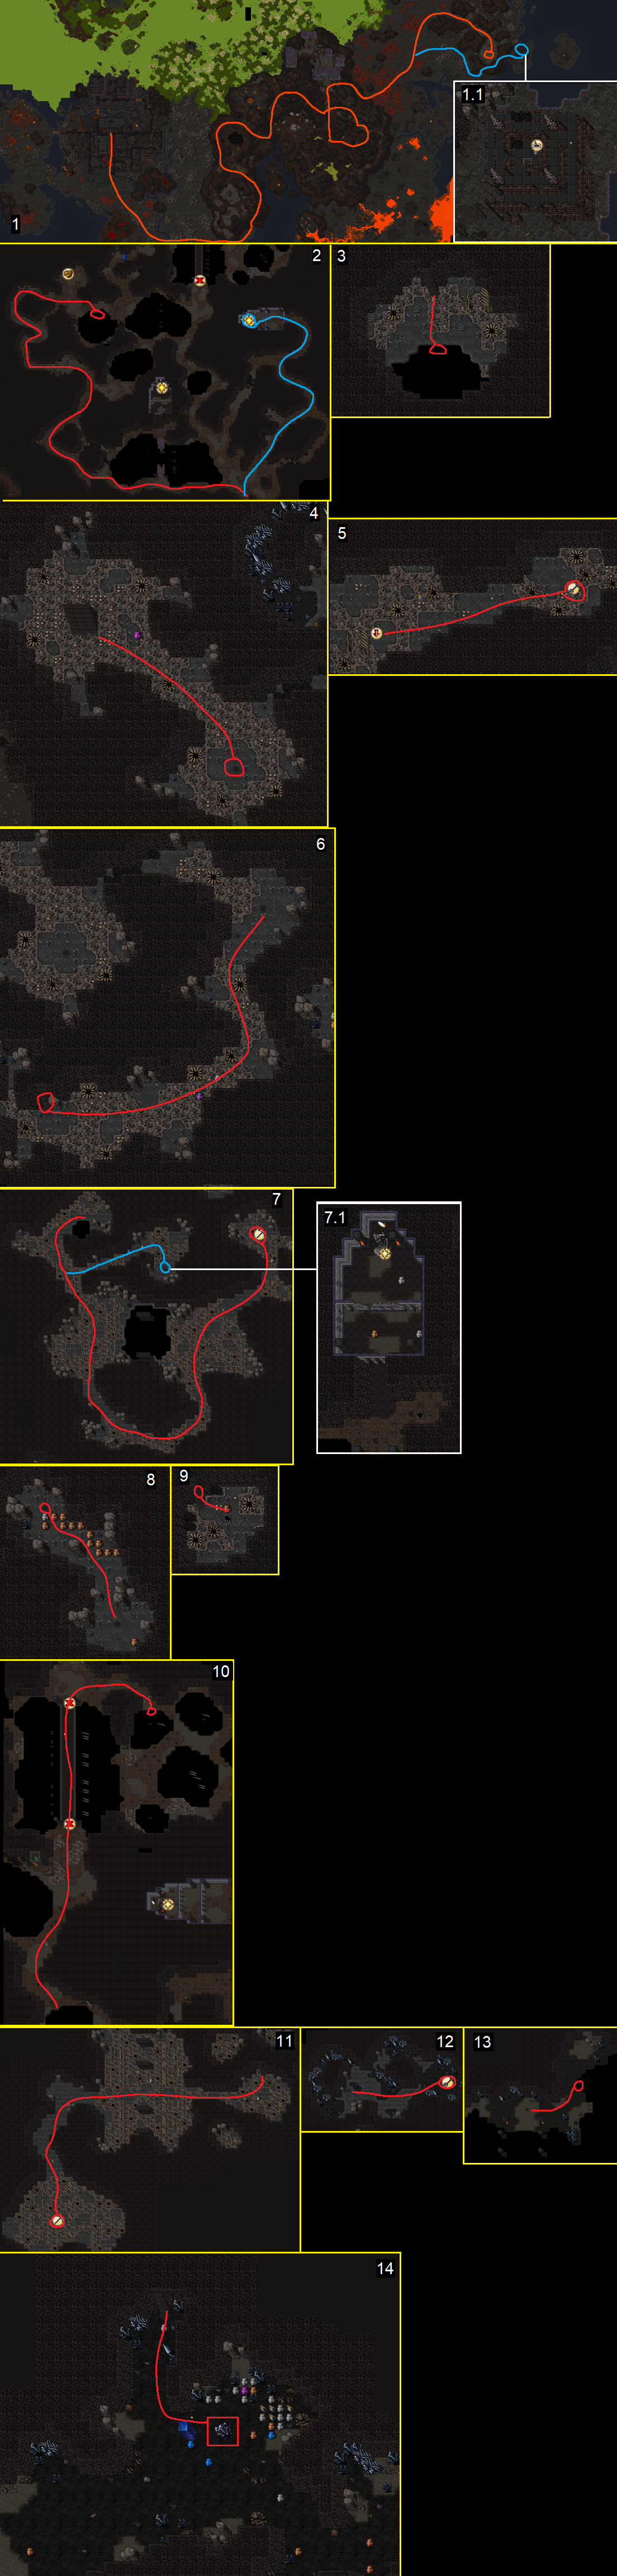
- Stone #1 - Map
- Head into the deeper section of Sheol (past the locked door using Key 9966). Go to the most southern part of the fire area here.
- You'll get to a point where lava blocks the corridor. Use the buckets of water on these tiles to turn them into walkable tiles and continue deeper.
- Eventually you'll reach an island protected with several Skeleton Warlord and a magic stone upstairs. Use the stone to enter the past.
- In the past you'll need to find where the temple is in Zarrith and speak to Varazin.
- Stone #2 - video - Map
- This stone is by far the most dangerous and requires a team. A team consisting of the following should easily succeed; 2 knights, 5+ shooters.
- Once inside you'll need to fight numerous Venerators, Incidamus, and Ashlord among many weaker creatures.
- Using this map you need to protect 7 of Zarrith's Citizens while they're being attacked by waves.
- Each NPC will have 5 waves spawn, with each wave consisting of 4 creatures. Each wave will be 20 seconds after each other. **The creatures that can be in the waves are; Blood Witch, Incidamus, Cerberus, Ashlord, Blasphemer, Skeleton Warlord, Shade.
- Once all citizens have been saved you can leave from the entrance teleport
- For this stone, anyone who has completed the mission may re-enter to assist others. This also means you can leave the stone at anytime and return later.
- Stone #3 - video - Map
- South-west of Zarrith is a shovel hole that leads to the third magic stone.
- Inside you Varazin will speak to you about sealing Medivia from the other worlds to prevent its devastation. You will need to protect Varazin while he casts his spells.
- More and more Ritualists and Shadow Guards will spawn on either side to attack the Barrier on that side. As they lose health you need to use the goblets on that corresponding side to lower your health but heal the barrier.
- Stone #4 - Map
- The fourth stone is located far to the east of Sheol. Once inside the magic stone you will be watching a cinematic of Umos the Dragon God fighting Rashed the Demon King. You do not need to do anything except wait for the cinematic to be over.
Mission 6 - Blasphemer Task
You will need to slay 800 Blasphemers.
There is only 1 "good" Blasphemer spawn: Torem's Court
But you can do also in Sheol Library and Sheol Elevator
After finish the Blasphemers task you need to deliver 50  Blasphemer Staff, which can be easily picked up during the task.
The reward for completing this task is 2,280,000 Experience.
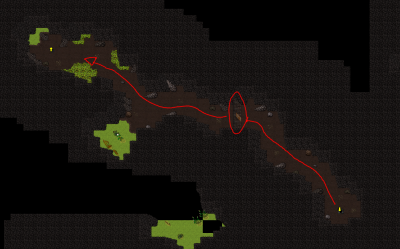
Mission 7 - The Corrupted Tower
- Video - Map
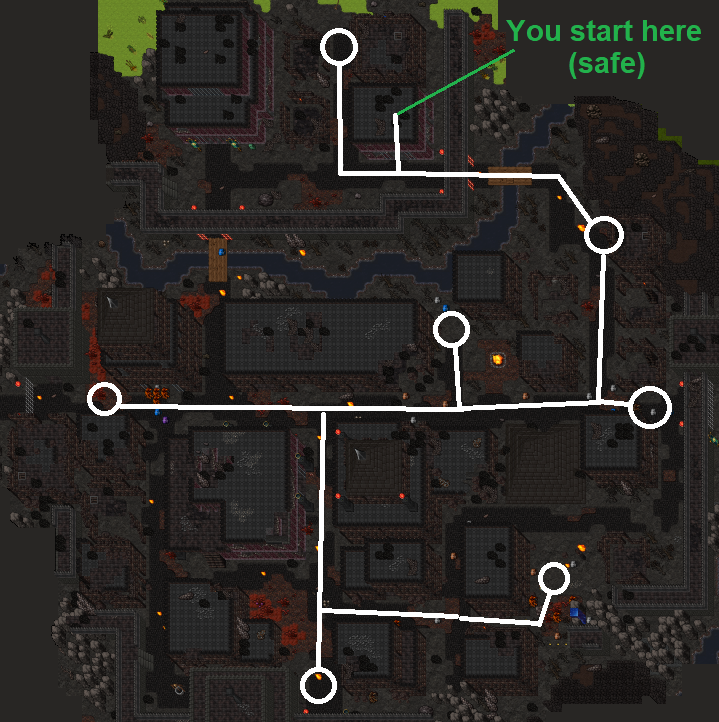
- Arbiter Kerrin asks you to enter the tower south-east of Zarrith and climb to the top to find NPC Mauldir.
- You'll face all kinds of creatures on the way including Skeleton Warlords, Blood Witches, Incidamus, Corruptors etc. The floors increase in difficulty as you travel upward.
- There are 2 main strategies to clearing the tower;
- Rush
Bring 2-3 knights and 5-8 shooters. The knights will rush upstairs while the shooters focus on magic walling the door, then clearing the room before moving further. If you follow this map the areas to magic wall have been marked with orange boxes.
- UE Clear
Bring 2-4 archmages who will stairhop the difficult floors before a knight will continue.
- Once on the top floor all players on the mission will need to speak to NPC Mauldir together as once one person has finished talking the NPCs will all disappear for 5-10 minutes until they respawn.
Mission 8 - Incidamus and Venerator Souls
You will need to slay 500 Incidamus and 500 Venerators and collect their souls using a Souldrainer.
There is 2 Incidamus spawns:
- Drowner's Lake
- Corruptor Hell Entrance
There is 1 Venerator spawn:
- Sheol Library
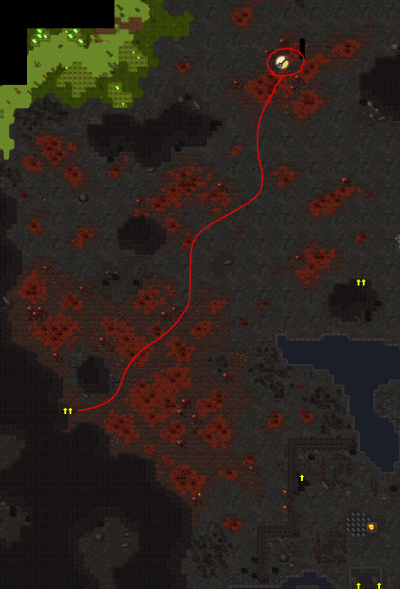
Mission 9 - Corruptor Crystal
Video - Quest Route Image
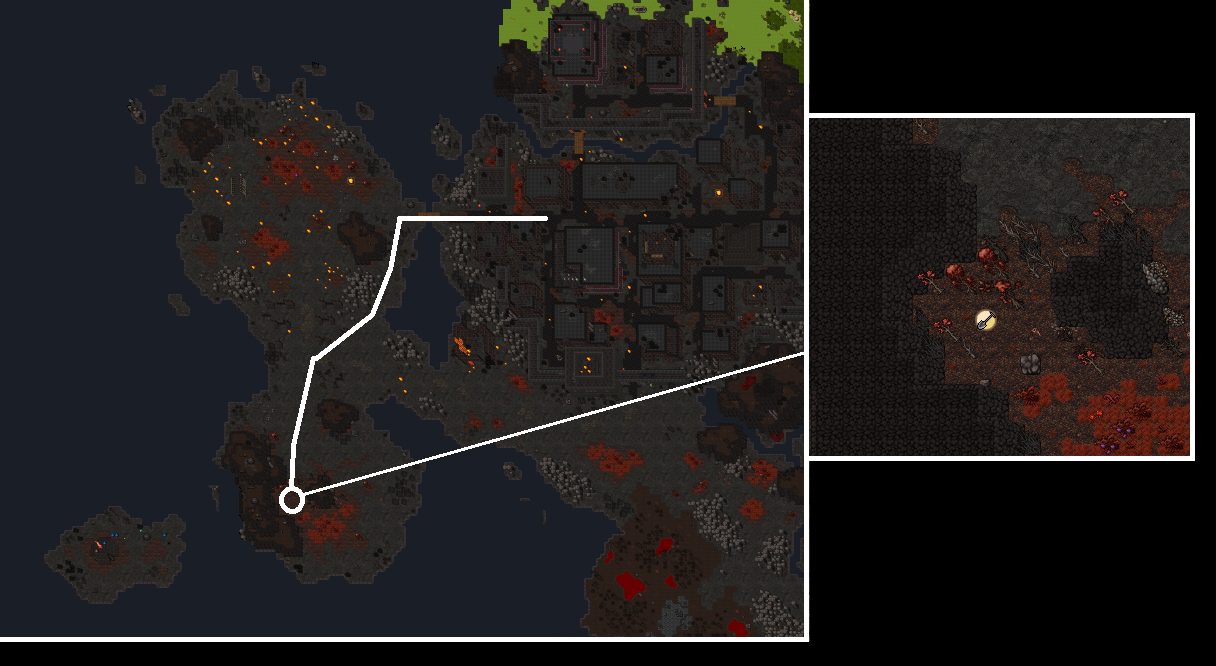
- Deep in Corruptor Hell, beyond the Incidamus lays the Corruptors where a special crystal is. You'll need to hit a lever to access the cave. Inside the cave you'll need to use 2 gravestones which will each summon a boss (Ozgalluch the Incidamus boss and Tagthoder the Corruptor boss) - this will remove some obstacles later in the journey.
- Once inside the Corruptors section take the east path and you'll find the crystal nearby the stairs. The person on the mission should use their quest item on the crystal to begin the ritual.
- Fog will appear making the area into an arena and after 10 seconds the first wave will spawn, with more waves spawning every 30 seconds after. There are 6 waves and each consist of 3 creatures. The 3 creatures can be either a Corruptor, Ashlord or Incidamus.
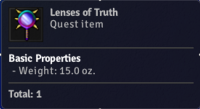
- Once you clear all the waves the fog will disappear and you receive a Lenses of Truth.
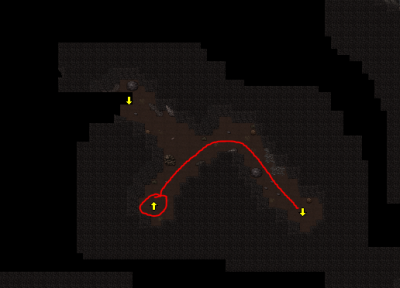
Mission 10 - Demorc Task
- You will need to slay 700 Demorcs.
- There are 2 spawns to hunt Demorcs:
- Demorc Entrance Spawn
- Demorc Main Spawn
- The reward for completing this task is 1,120,000 Experience.
Mission 11 - Convince Demorc Brute
Using the Mind Crystal you must convince just one Demorc Brute while they're on low (red) health.
The chance of a successful persuasion is very low. Once convinced you must interrogate them for knowledge on Demorc Warchiefs weak points.
This is what it looks like when you succeed and turn a Demorc Brute into a Weakened Demorc Brute. Once they're in the weakened state, you must talk to them. As a rough estimate (opinion incoming) it's a 1/100 chance to succeed.
A relatively "easy" way to do this mission is to leave some Demorc Brutes in the red health, and use the item every 2 minutes.
Player: Hi
Weakened Demorc Brute: I beg you... Do not kill me!...
Weakened Demorc Brute: I will tell you everything you want to know, just spare my life...
Weakened Demorc Brute: What do you want to know?
Player: Weak Point
Weakened Demorc Brute: Only the strongest demorcs can become warchiefs, they have no flaws...
Weakened Demorc Brute: But just like me they are still demorcs. And we all fear one thing...
Weakened Demorc Brute: Fire...
Weakened Demorc Brute: I have told you enough, haven't I? Now please, let me go...
<Weakened Demorc Brute disappears>
Now go back and talk with Grandmaster Elijah.
Mission 12 - Demorc Warchief Task
You will need to slay 700 Demorc Warchiefs. There is only 1 spawn with Demorc Warchiefs:
- Demorc Main Spawn
After finish speak with Grandmaster Elijah
The reward for completing this task is 2,950,000 Experience.
Go to the right side of the demorc spawn and find Demorc Lord Galzebran:
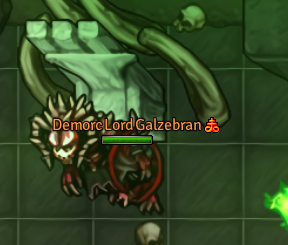
Player: hi
Demorc Lord Galzebran: So this is you, that mortal who has invaded my domain?...
Demorc Lord Galzebran: I am suprised that an entity from the world of Medivia has managed to destroy this many of my troops...
Demorc Lord Galzebran: As you may already tell, I cannot let more of my kind die by your hand and for my kingdom to become a ruin...
Demorc Lord Galzebran: I surrender. We will aid you in the war against Baalerun and will not attack Medivia...
Demorc Lord Galzebran: We will grant you permission to enter the swamp and meet our prisoner, which is what you wanted in the first place...
Demorc Lord Galzebran: My brothers may not understand or accept my decision. Expect them to still be hostile against you...
Demorc Lord Galzebran: They were not trained to surrender, after all.
After this dialogue, you will be able to enter the door here to talk with the blacksmith:
Mission 13 - Kill Blacksmith
Talk with the Blacksmith Azzodon:
Player: Hi
Blacksmith Azzodon: WHAT? A MORTAL? IN THIS REALM? DID I EAT TOO MANY FIRE MUSHROOMS OR WHAT?...
Blacksmith Azzodon: Who are you and what are you doing in the greatest smithery?
Player: mission
Blacksmith Azzodon: Who are you? You do not remind me of any demorc. A human?...
Blacksmith Azzodon: That passed the gates of Sheol and reached this place? That is impossible...
Blacksmith Azzodon: But I sense some strange power within you. You came to my great smithery to create you something...
Blacksmith Azzodon: Yes, but I will never work for a weakling. If you want my help you need to prove yourself in a duel with me...
Blacksmith Azzodon: Show me what you are made of.
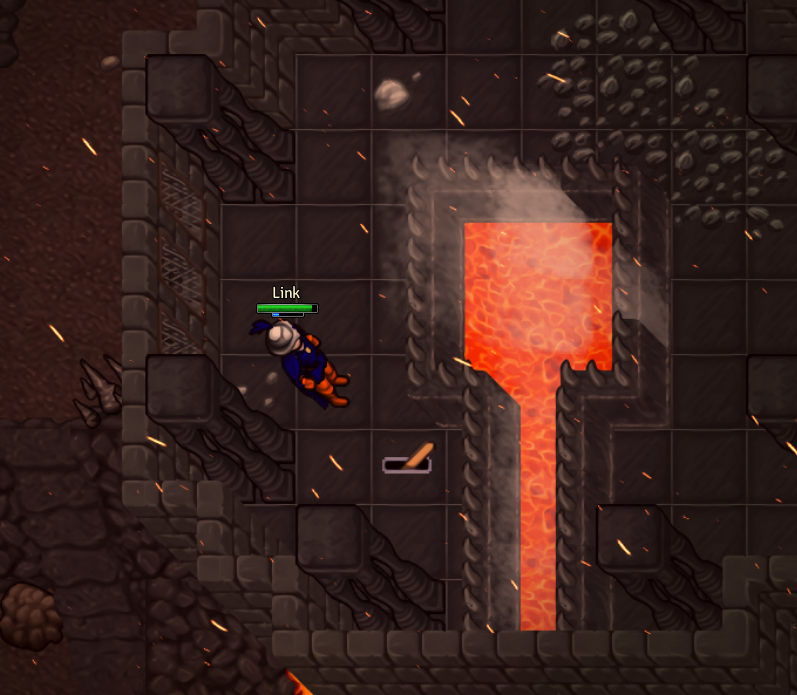
- You will fight against the Blacksmith Azzodon. Expect a fight with an weak version of an Ashlord, but with huge ammount of HP (94,800).
- After the fight speak with him again:
Player: mission
Blacksmith Azzodon: Well, I have not expected such power from such a tiny creature. Or is it me who have grown weak...
Blacksmith Azzodon: I have been imprisoned here for ages, first by Baalerun and then after war between demorcs and demons by Galzebran...
Blacksmith Azzodon: I am imprisoned for my own transgressions against my race. I was ordered by Baalerun to forge the mightiest armor...
Blacksmith Azzodon: Armor that would be able to withstand any magic, even the mighty sacred artifacts of the watchers...
Blacksmith Azzodon: What I did not know the living metal he provided was tainted by dark sorcery. Instead of deflecting magic it was absorbing it, and its hunger was
neverending...
Blacksmith Azzodon: Back then I was the only one who knew about Baalerun's treachery and the rest simply thought that Molgorth went insane...
Blacksmith Azzodon: And for this dark knowledge Baalerun imprisoned me away from anyone who would be willing to listen...
Blacksmith Azzodon: After the war between Baalerun and Galzebran my punishment did not end. I regret helping that vile beast. But what choice did I have?...
Blacksmith Azzodon: You, me and Molgorth have the same enemy. We need to hurry, Baalerun is probably preparing for the dark ritual to invade Medivia...
Blacksmith Azzodon: To access the Black Castle you will need a mighty key that I created long ago. I made one and I can make another, with the right ingredients and
tools...
Blacksmith Azzodon: The key was made out of hellstone, a very rare metal found in this world...
Blacksmith Azzodon: I will need 20 hellstone ores that will serve as a base of the crimson key...
Blacksmith Azzodon: But the gates of the Black Castle are not only protected by a complex mechanism...
Blacksmith Azzodon: They are also sealed by a barrier placed by performing an ancient ritual of sacrifice...
Blacksmith Azzodon: The counterspell to break the barrier also requires a sacrifice. Luckily, a sacrifice of our enemies...
Blacksmith Azzodon: Obtaining enough hellstone might take a while, so while you are searching for it, chop the heads of cerbers...
Blacksmith Azzodon: Take down 1000 cerbers and bring me 100 of their heads, required for the counterspell.
Mission 14 - Cerberus Task
- You will need for this mission:
There is only 1 good spawn with Cerberus: Cerberus Hell - video of spawn
The reward for completing this task is 3,650,000 Experience.
Mission 15 - Flamebringer Task
- You will need for this mission:
There is only 1 spawn with Flamebringers: Flamebringer Hell
The reward for completing this task is 3,040,000 Experience.
Mission 16 - Typhon Task
- You will need for this mission:
There are 2 spawns of Typhons:
- Small Typhon Spawn
- Typhon Island
The reward for completing this task is 2,800,000 Experience.
Mission 17 - The Forge
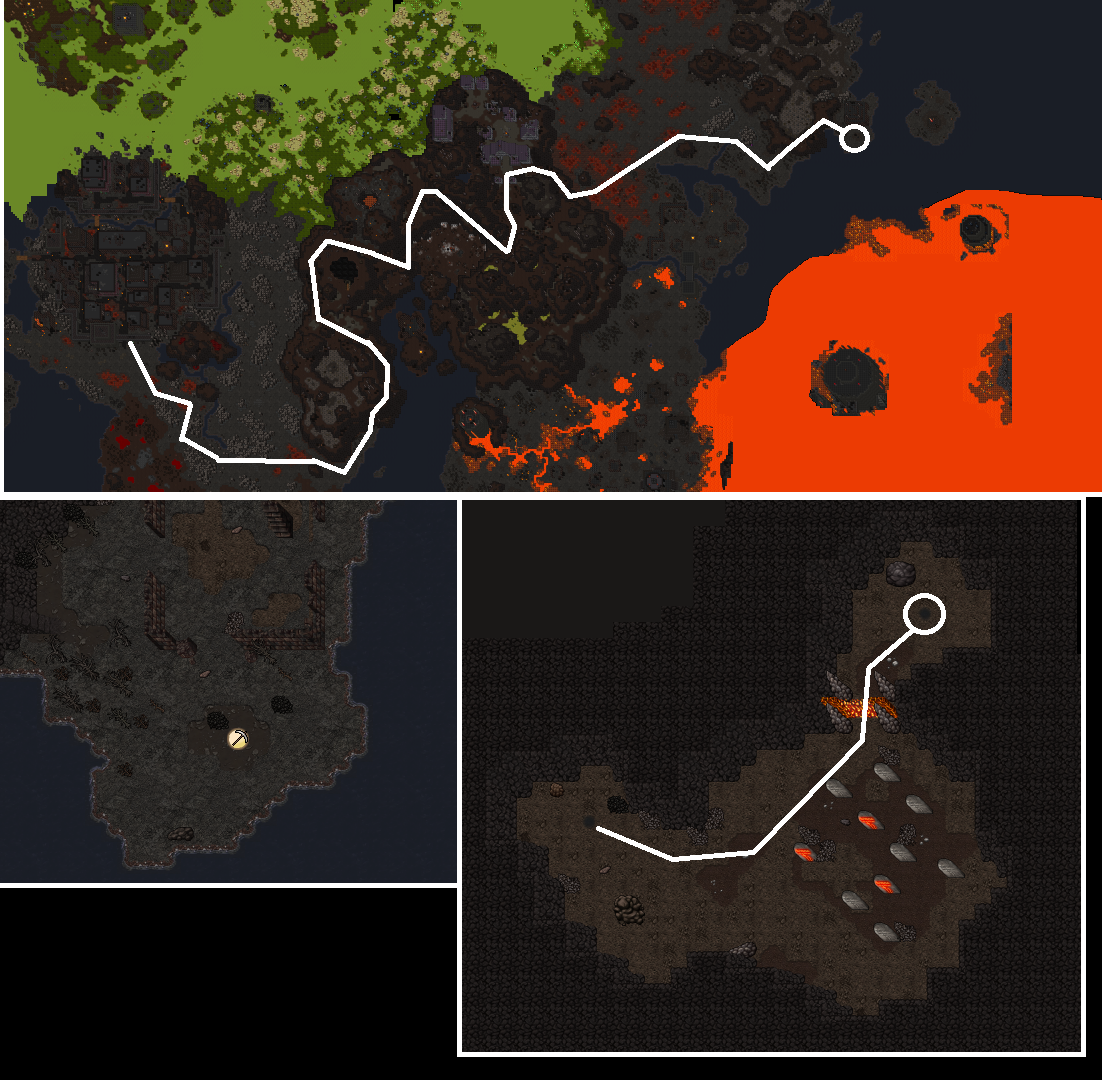
- Then way to Cerberus spawn (Cerberus Hell) and follow this way:
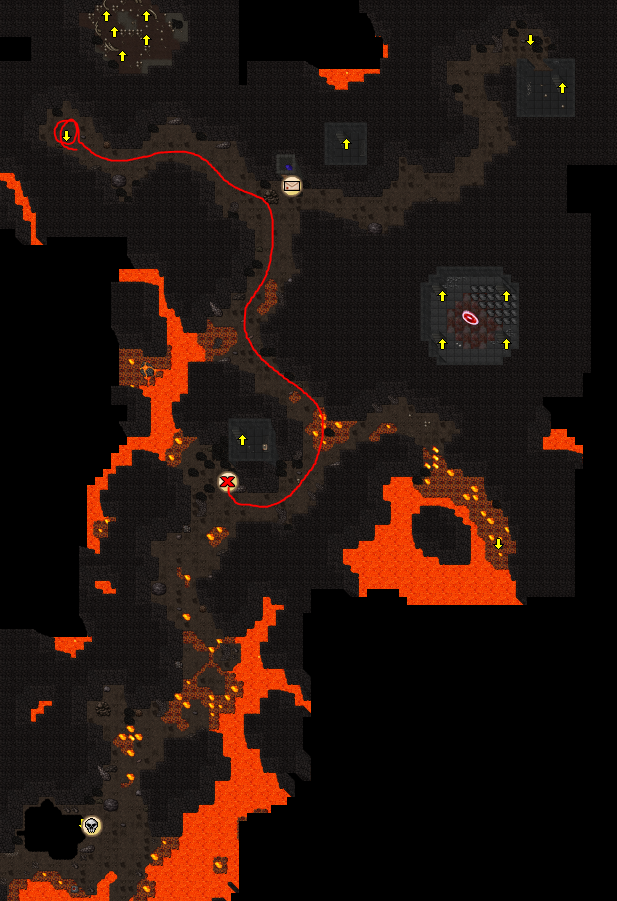
- Go next to the forge till appear this message (Take care, there is 2 Succubus):
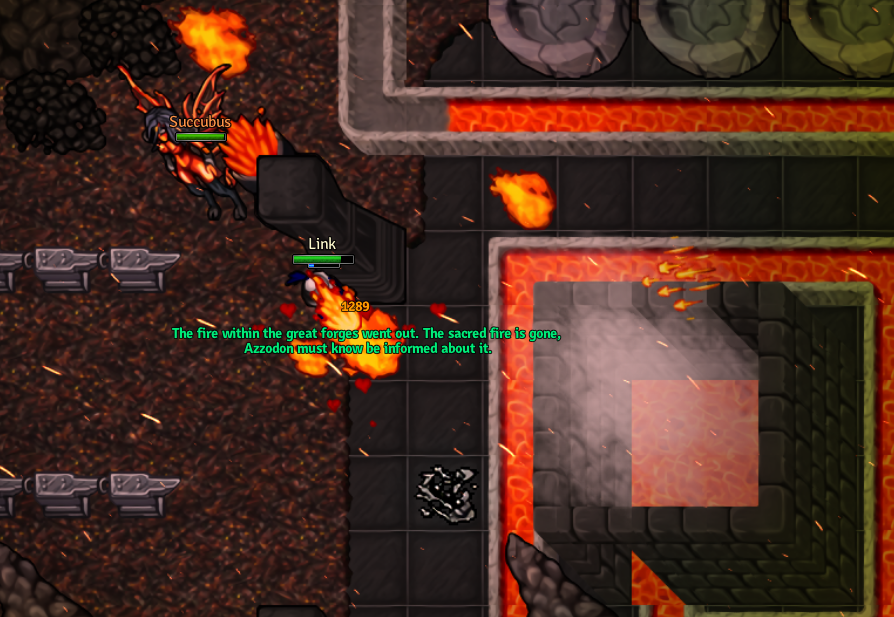
*ATTENTION: For the next part you'll need a team with at least 2 blockers and some shooters.
- Go to The Library, in the deepest part with Venerators you'll find a giant orb suspended on some pillars protected by a single Corruptor. Levitate up to the top of the pillars and use the orb to be sent back into the past again.
- Follow the way :
CONTINUE
Mission 18 - Corruptor
Mission 19 - Succubus Task
- Information incomplete:
- You will need to slay 400 Succubus.
- There is only 1 spawn of Succubus:
- Flamebringer Hell
- The reward for completing this task is 1,960,000 Experience.
Mission 20 - Dreadlord Task
Mission 21 - The 6 Seals
Mission 22 - Rashed and Baalerun
Congratulations, you've saved Medivia and done a great service to the resistance effort of Sheol.
Your soul is strengthened and you've achieved mastery in your vocation.


