Mission 1 - Gaining Access
- Link to Access Mission Page
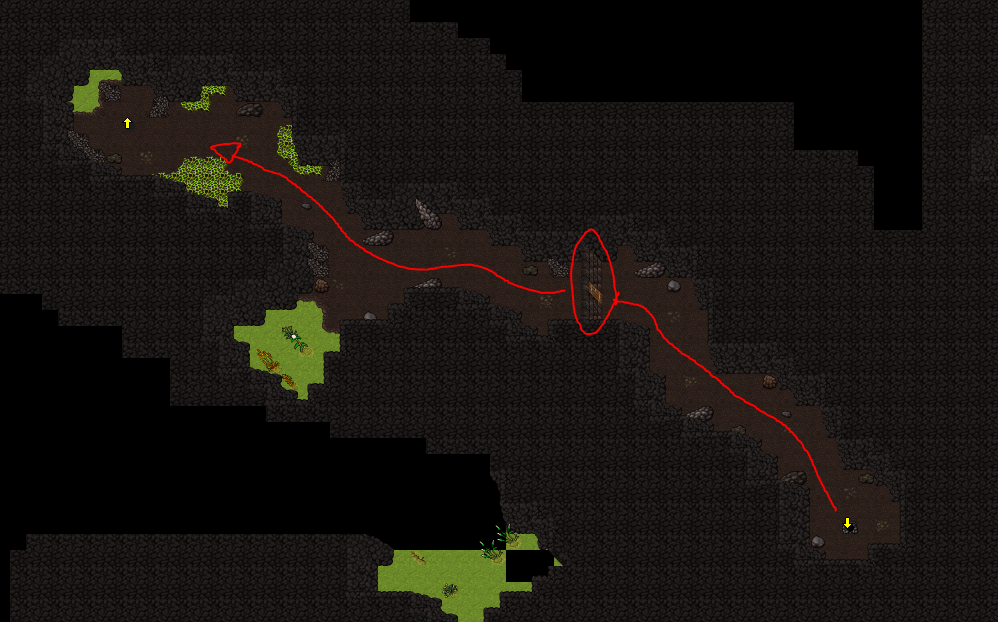
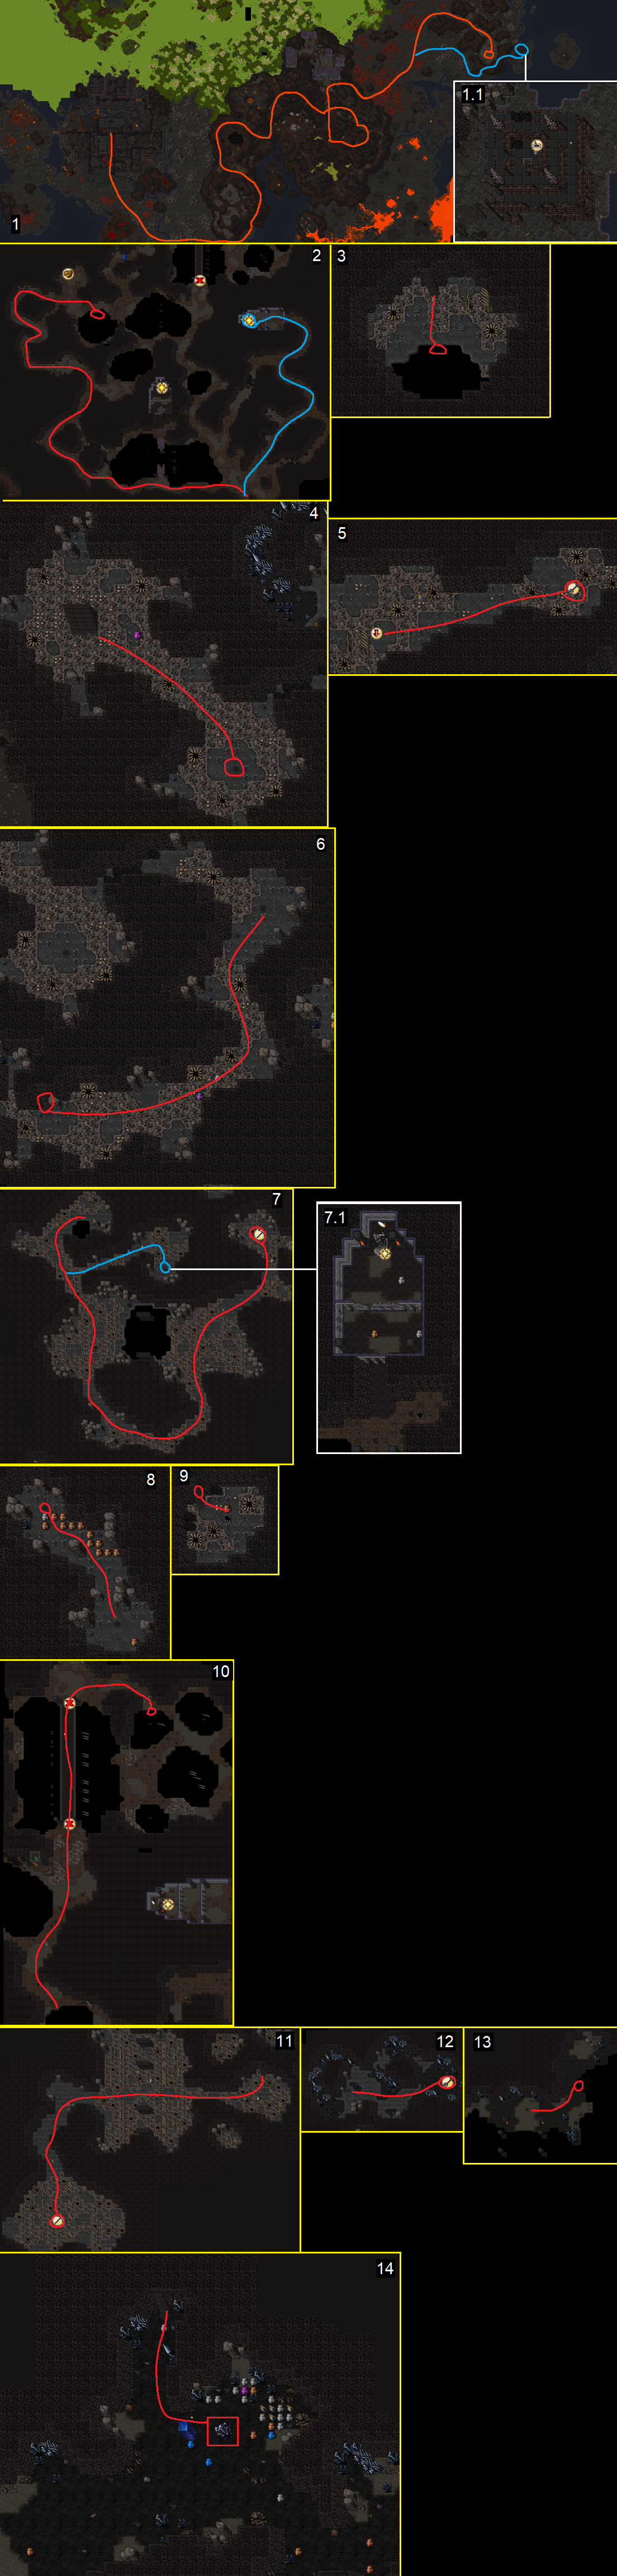
- Once you've defeated all the hellgate guardians, you can access Sheol through the main hellgate in the dwarf generals area of the Mittenhoff mines. You can travel there via minecart from the main hub.
Mission 2 - Blood Witch Task
Mission 3 - Freeing Molgorth
Mission 4 - Ashlord Task
Mission 5 - Magic Stones
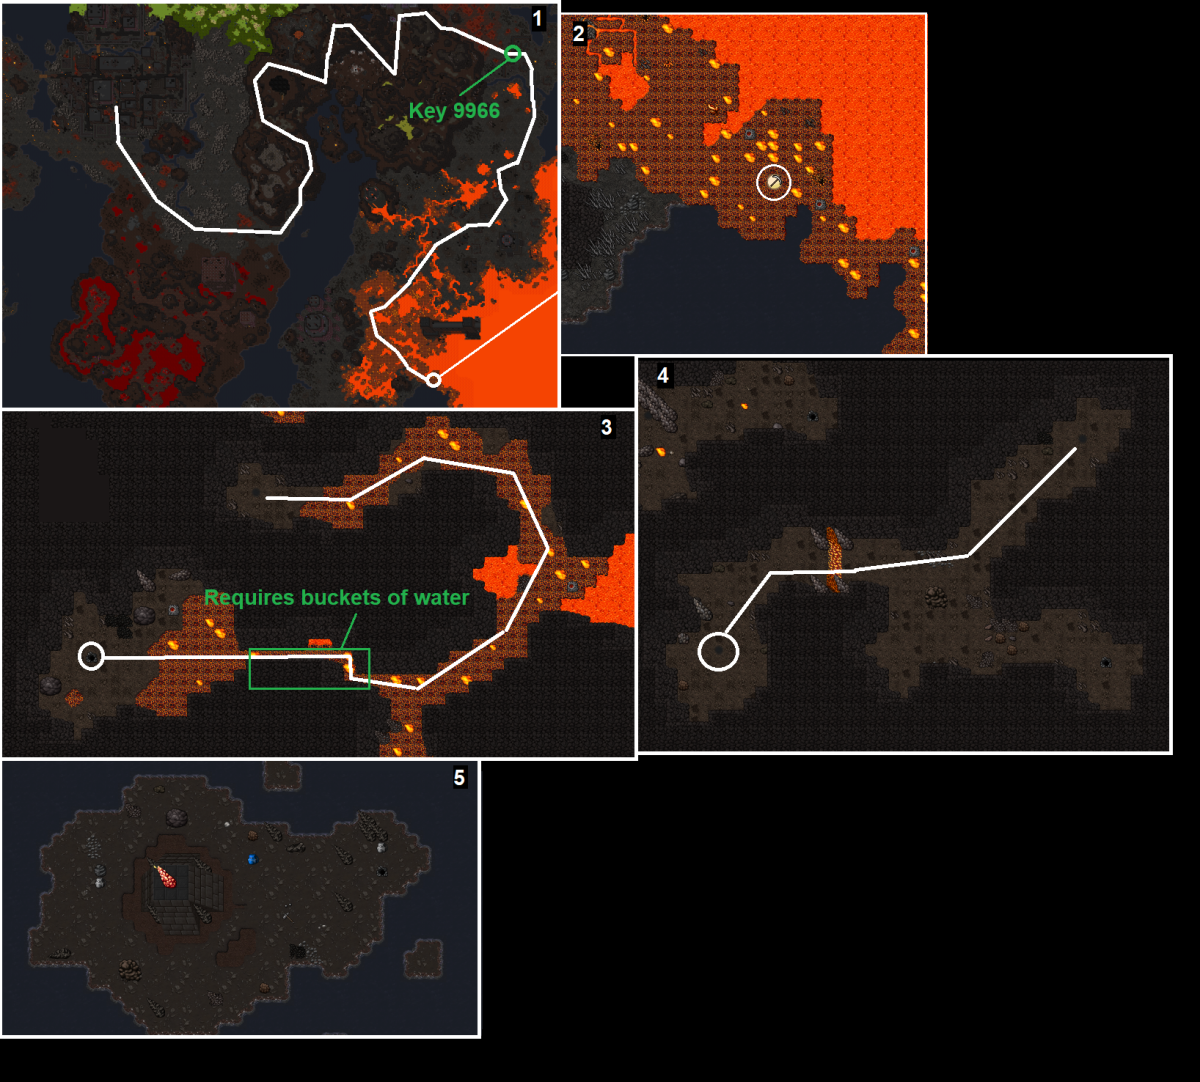
- Requires Key 9966 for Magic Stone #1
- Requires several buckets of water for Magic Stone #1 (Bring 10+)
- You must do each of these stones in proper order.
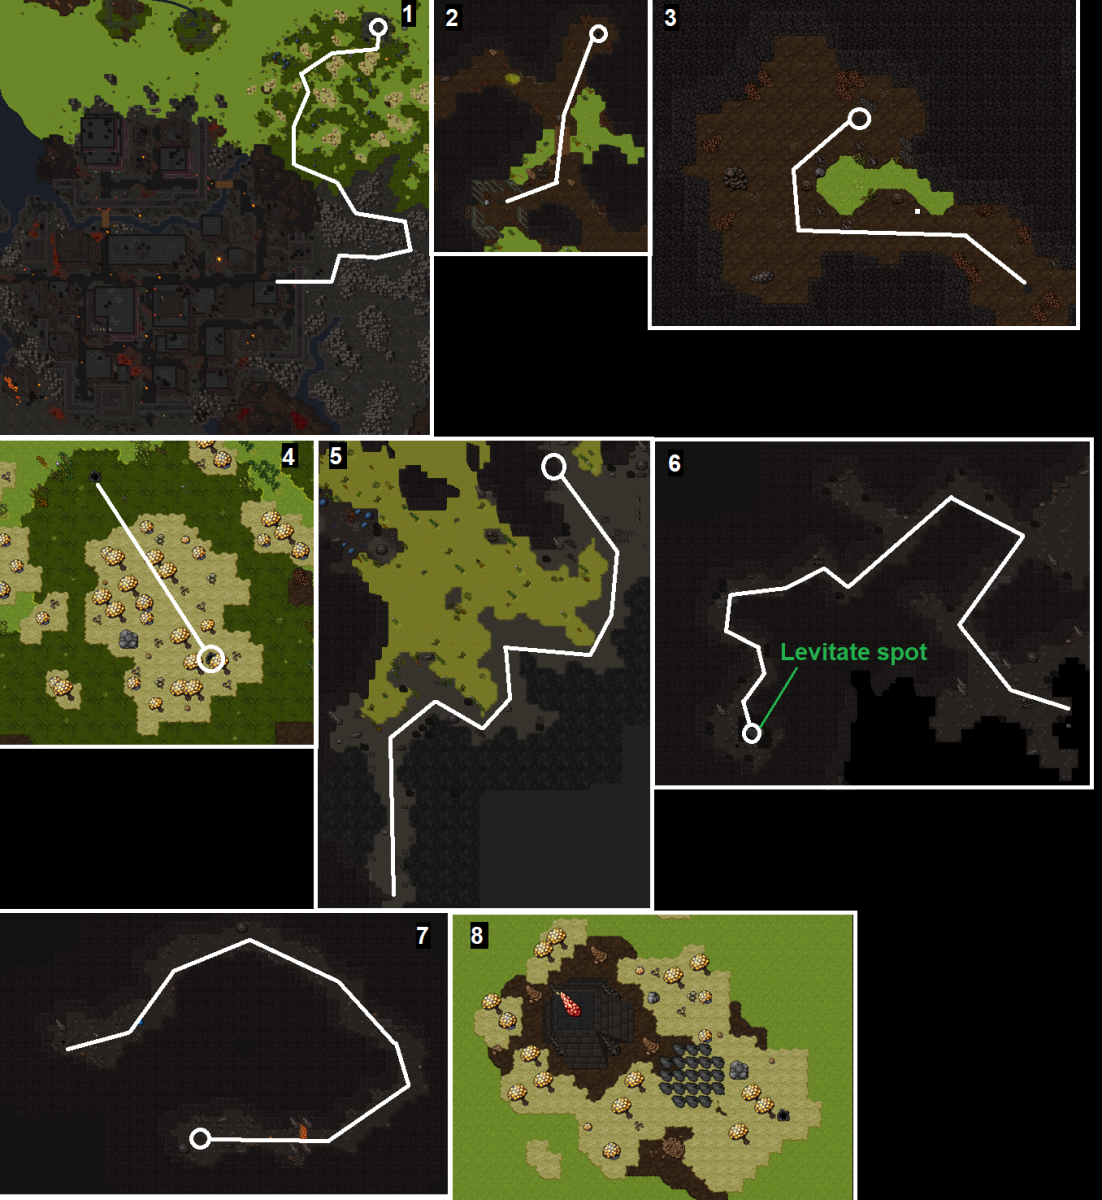
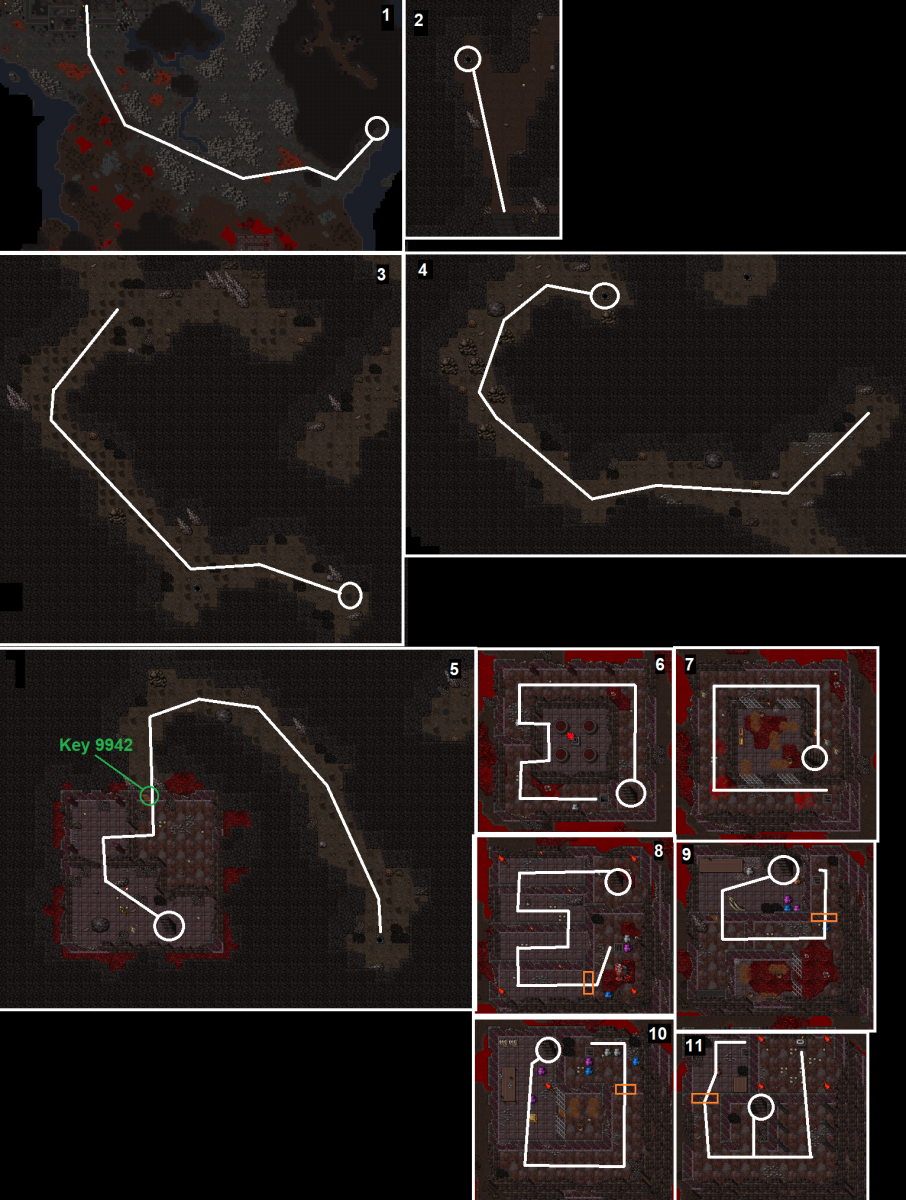
- Stone #1 - Map
- Head into the deeper section of Sheol (past the locked door using Key 9966). Go to the most southern part of the fire area here.
- You'll get to a point where lava blocks the corridor. Use the buckets of water on these tiles to turn them into walkable tiles and continue deeper.
- Eventually you'll reach an island protected with several Skeleton Warlord and a magic stone upstairs. Use the stone to enter the past.
- In the past you'll need to find where the temple is in Zarrith and speak to Varazin.
- Stone #2 - video - Map
- This stone is by far the most dangerous and requires a team. A team consisting of the following should easily succeed; 2 knights, 5+ shooters.
- Once inside you'll need to fight numerous Venerators, Incidamus, and Ashlord among many weaker creatures.
- Using this map you need to protect 7 of Zarrith's Citizens while they're being attacked by waves.
- Each NPC will have 5 waves spawn, with each wave consisting of 4 creatures. Each wave will be 20 seconds after each other. ***The creatures that can be in the waves are; Blood Witch, Incidamus, Cerberus, Ashlord, Blasphemer, Skeleton Warlord, Shade.
- Once all citizens have been saved you can leave from the entrance teleport
- For this stone, anyone who has completed the mission may re-enter to assist others. This also means you can leave the stone at anytime and return later.
- Stone #3 - video - Map
- South-west of Zarrith is a shovel hole that leads to the third magic stone.
- Inside you Varazin will speak to you about sealing Medivia from the other worlds to prevent its devastation. You will need to protect Varazin while he casts his spells.
- More and more Ritualists and Shadow Guards will spawn on either side to attack the Barrier on that side. As they lose health you need to use the goblets on that corresponding side to lower your health but heal the barrier.
- Stone #4 - Map
- The fourth stone is located far to the east of Sheol. Once inside the magic stone you will be watching a cinematic of Umos the Dragon God fighting Rashed the Demon King. You do not need to do anything except wait for the cinematic to be over.
Mission 6 - Blasphemer Task
Mission 7 - The Tower
- Video - Map
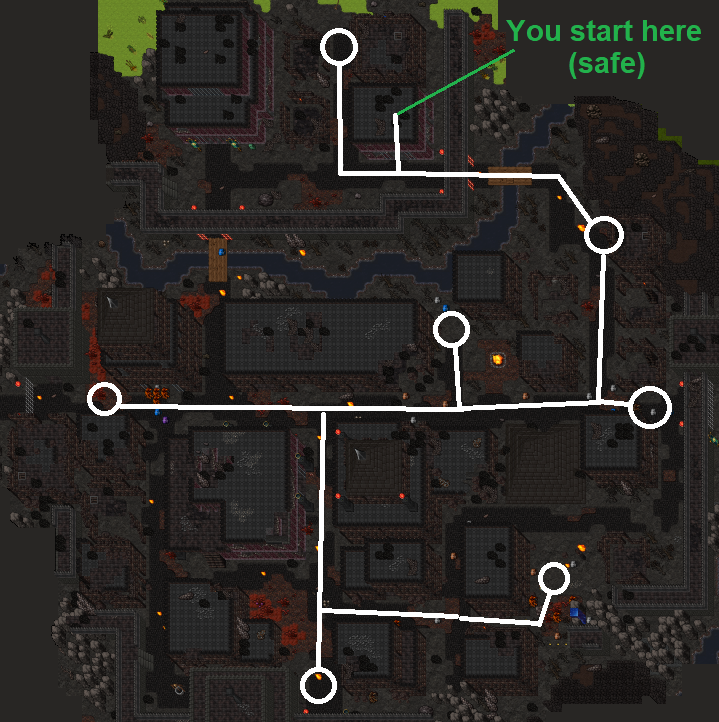
- Arbiter Kerrin asks you to enter the tower south-east of Zarrith and climb to the top to find NPC Mauldir.
- You'll face all kinds of creatures on the way including Skeleton Warlords, Blood Witches, Incidamus, Corruptors etc. The floors increase in difficulty as you travel upward.
- There are 2 main strategies to clearing the tower;
- Rush
Bring 2-3 knights and 5-8 shooters. The knights will rush upstairs while the shooters focus on magic walling the door, then clearing the room before moving further. If you follow this map the areas to magic wall have been marked with orange boxes.
- UE Clear
Bring 2-4 archmages who will stairhop the difficult floors before a knight will continue.
- Once on the top floor all players on the mission will need to speak to NPC Mauldir together as once one person has finished talking the NPCs will all disappear until the next server save.
Mission 8 - Incidamus and Venerator Souls
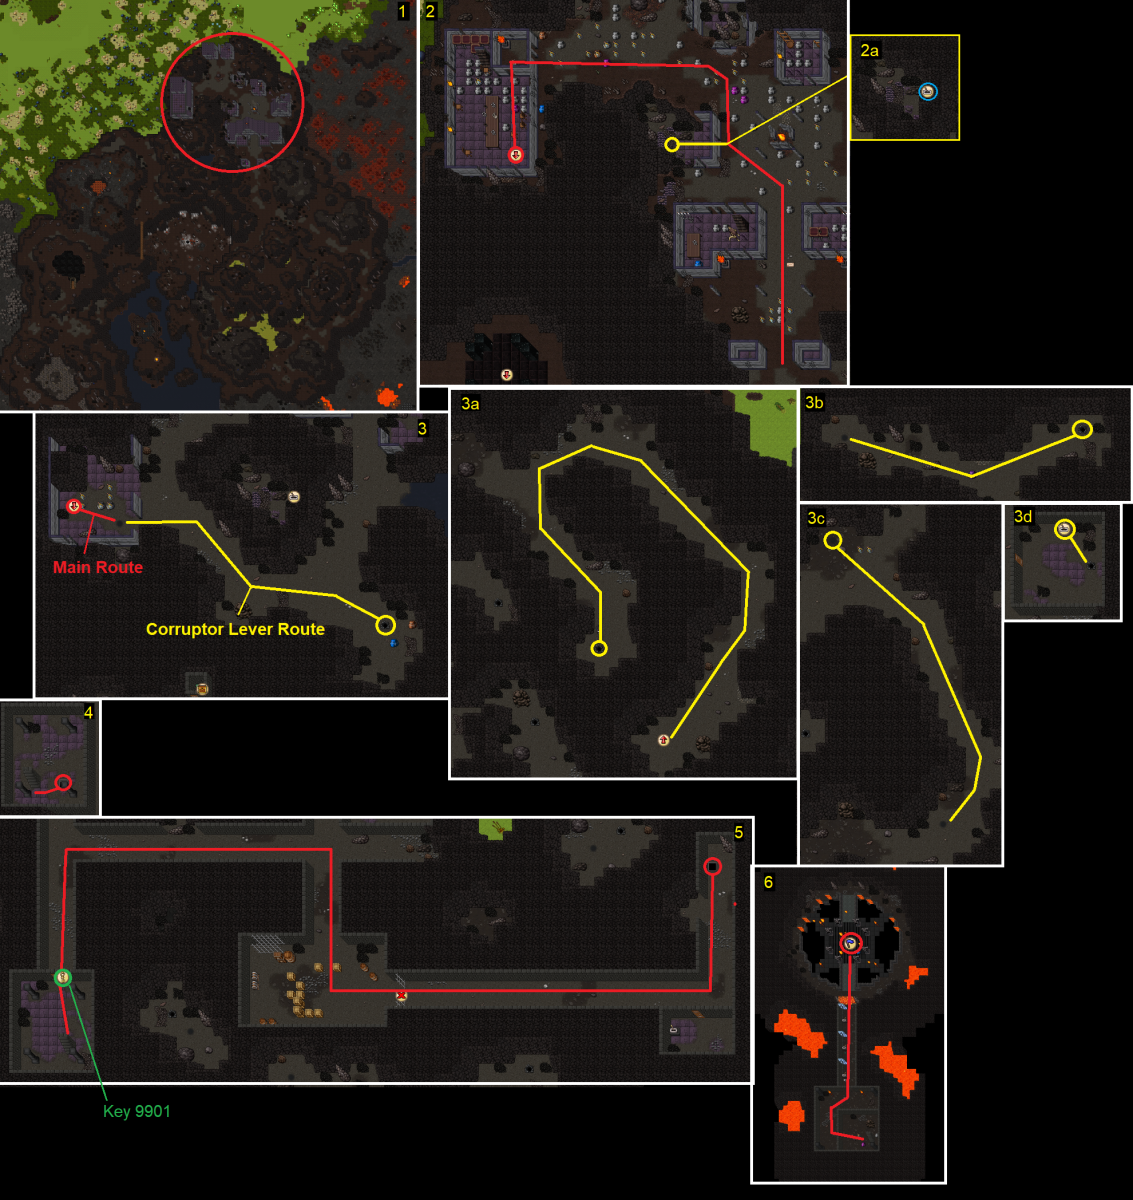
Mission 9 - Corruptor Crystal
Video - Quest Route Image
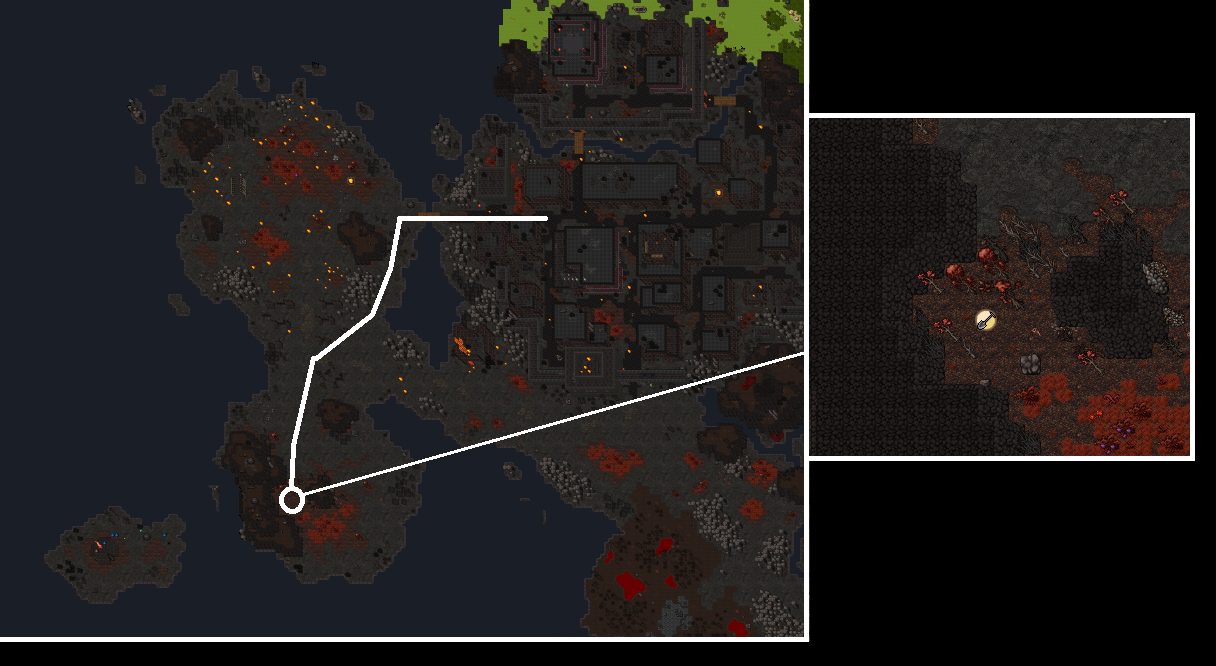
- Deep in Corruptor Hell, beyond the Incidamus lays the Corruptors where a special crystal is. You'll need to hit a lever to access the cave. Inside the cave you'll need to use 2 gravestones which will each summon a boss (Ozgalluch the Incidamus boss and Tagthoder the Corruptor boss) - this will remove some obstacles later in the journey.
- Once inside the Corruptors section take the east path and you'll find the crystal nearby the stairs. The person on the mission should use their quest item on the crystal to begin the ritual.
- Fog will appear making the area into an arena and after 10 seconds the first wave will spawn, with more waves spawning every 30 seconds after. There are 6 waves and each consist of 3 creatures. The 3 creatures can be either a Corruptor, Ashlord or Incidamus.
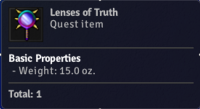
- Once you clear all the waves the fog will disappear and you receive a Lenses of Truth.
Mission 10 - Demorc Task
Mission 11 - Convince Demorc Brute
- Using the Mind Crystal
 you must convince just one Demorc Brute while they're on low (red) health. The chance of a successful persuasion is very low. Once convinced you must interrogate them for knowledge on Demorc Warchiefs weak points.
This is what it looks like when you succeed and turn a Demorc Brute into a Weakened Demorc Brute. Once they're in the weakened state, you must talk to them. As a rough estimate (opinion incoming) it's a 1/100 chance to succeed.
Player: Hi
Weakened Demorc Brute: I beg you... Do not kill me!...
Weakened Demorc Brute: I will tell you everything you want to know, just spare my life...
Weakened Demorc Brute: What do you want to know?
Player: Weak Point
Weakened Demorc Brute: Only the strongest demorcs can become warchiefs, they have no flaws...
Weakened Demorc Brute: But just like me they are still demorcs. And we all fear one thing...
Weakened Demorc Brute: Fire...
Weakened Demorc Brute: I have told you enough, haven't I? Now please, let me go...
Weakened Demorc Brute disappears>
Now go back and talk with Grandmaster Elijah.
Mission 12 - Demorc Warchief Task
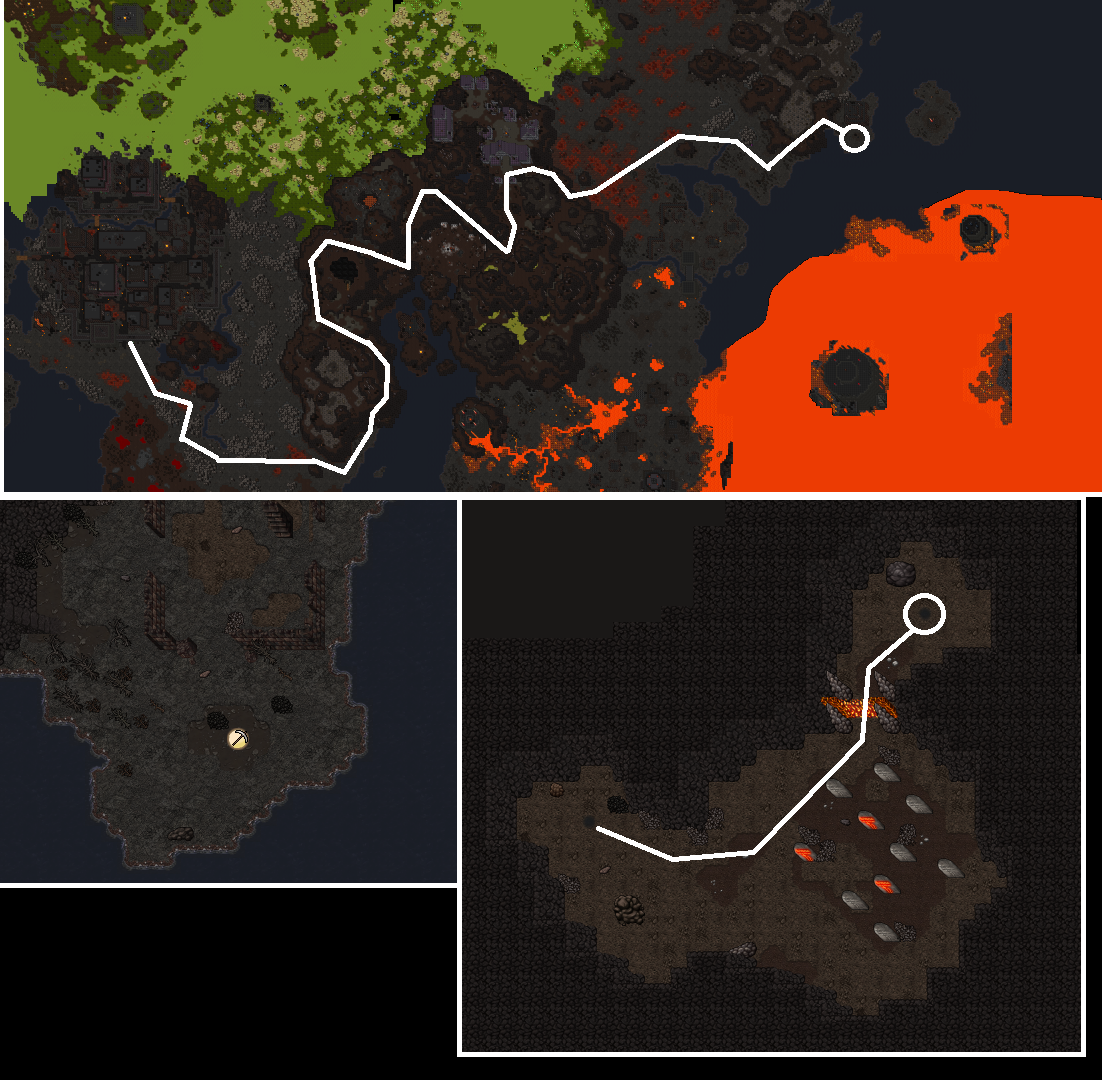
- You will need to slay 700 Demorc Warchiefs. There is only 1 spawn with Demorc Warchiefs:
- Demorc Main Spawn
- The reward for completing this task is 2,950,000 Experience.
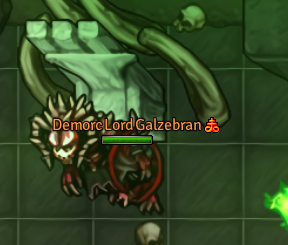
After complete the Task go to the right side of the demorc spawn and find Demorc Lord Galzebran:
Player: hi
Demorc Lord Galzebran: So this is you, that mortal who has invaded my domain?...
Demorc Lord Galzebran: I am suprised that an entity from the world of Medivia has managed to destroy this many of my troops...
Demorc Lord Galzebran: As you may already tell, I cannot let more of my kind die by your hand and for my kingdom to become a ruin...
Demorc Lord Galzebran: I surrender. We will aid you in the war against Baalerun and will not attack Medivia...
Demorc Lord Galzebran: We will grant you permission to enter the swamp and meet our prisoner, which is what you wanted in the first place...
Demorc Lord Galzebran: My brothers may not understand or accept my decision. Expect them to still be hostile against you...
Demorc Lord Galzebran: They were not trained to surrender, after all.
After this dialogue, you will be able to enter the door here to kill the blacksmith
Mission 13 - Kill Blacksmith
Mission 14 - Cerberus Task
Mission 15 - Flamebringer Task
Mission 16 - Typhon Task
Mission 17 - The Forge
- Information incomplete:
- Travel to the forge?, then to the demonic hand? and then to the forge in the past.
Mission 18 - Corruptor Task
- Information incomplete:
- You will need to slay 500 Corruptors.
- There is only 1 spawn of Corruptors:
- Corruptor Hell
- The reward for completing this task is 4,650,000 Experience and the Crimson Key to the Black Gate.
Mission 19 - Succubus Task
- Information incomplete:
- You will need to slay 400 Succubus.
- There is only 1 spawn of Succubus:
- Flamebringer Hell
- The reward for completing this task is 1,960,000 Experience.
Mission 20 - Dreadlord Task
Mission 21 - The 6 Seals
Mission 22 - Rashed and Baalerun


